BS_Training · BioSignals
Complete operator handbook
This handbook explains the integrated clinic and biofeedback training application: initial authorization, everyday clinic work, acquisition, structured training, patient feedback, review, reports, media, exports and maintenance. Use the chapter navigation or search, then follow the steps in the order shown. Technical channel abbreviations, filenames and time formats intentionally remain consistent between languages.
No matching chapters
How to use this handbook
BS_Training is one desktop application with two connected workspaces: clinic management and the graph/training workspace. The clinic workspace manages people, appointments and documentation. The training workspace receives signals, records sessions, presents feedback and reviews saved recordings. The Training studio adds an optional structured plan, patient display, workshop and session tools; it does not replace the main recording controls.
Start with Initial activation for a new clinic. For an established clinic, read Daily workflow, then the chapter for the action you need. For structured training, read the chapters from Training center through Workshop operation in sequence. Each section explains both the controls and the consequences of using them; changing a display preference is different from changing what is recorded.
This is an operator guide to implemented software behavior, not a prescribed treatment protocol. A qualified practitioner selects clinically appropriate goals, durations and instructions. Availability of a signal or module depends on the connected licensed hardware and the installed build. A label in a menu does not prove that a particular sensor supplies that channel. Automated summaries support professional review; they do not establish a diagnosis.
Computer, hardware and working conditions
Use the supported Windows installation supplied for your clinic, its approved BioSignals biofeedback device, and an Internet connection for authorization. Keep the complete application folder and its supporting libraries together. Copying only the executable to another directory may omit multimedia tools, language resources or other dependencies. Use the supplied desktop shortcut or the approved application folder.
Connect the intended sensor before starting the initial activation. For a BLE connection, check that the bridge/communication software used by your installation has connected to the correct physical device. A telephone finding the sensor does not prove that Windows has an active connection. Avoid competing applications trying to use the same sensor, microphone or camera at the same time.
Before a patient arrives, verify signal reception, available disk space, camera selection, microphone permission and the recording level meter. Keep Windows power settings from sleeping during a session. Device signal quality, camera throughput and computer load affect acquisition; increasing a displayed target or selecting a different model name does not improve the physical signal.
Initial activation and clinic owner verification
- Connect a BioSignals biofeedback device and start BS_Training. Initial authorization requires an appropriate detected biofeedback device. A different device type or an absent device cannot be replaced by choosing a model in a dropdown.
- Enter the clinic owner's registered email address when requested. The application sends the owner and detected hardware information for Internet verification. The owner must exist in the server's customer records, and the connected serial number must be permitted for that owner and product.
- Continue only after successful authorization. An unknown email, unauthorized serial number, blocked entitlement, wrong hardware type or failed verification prevents access. Read the displayed reason and resolve the corresponding account, device or connection problem; creating a local user does not create a server customer.
- Complete the local administrator setup: enter the administrator's name, a clinic username and a password, then confirm the password. Use at least eight characters. The owner email identifies the licensed clinic; the local username and password identify the person signing into the clinic. These are separate functions.
- After setup, enter the clinic workspace, create the required staff and patients, and assign care responsibilities. There is no shared default password. Store recovery information according to the clinic's own access policy.
Do not delete the local database to resolve a licensing rejection: it does not change the server registration and can remove clinic records. If the owner email or authorized hardware must change, contact the supplier to reconcile the server registration and the installation. Never publish your password or patient database in a support message.
Later launches, login and password visibility
On later launches, the application remembers the clinic binding and requests fresh online authorization using the owner and detected hardware. Remembered owner details are not an unlimited offline authorization. The application also verifies permission before a new recording. A staff member signing in locally does not replace the licensed owner or change the device entitlement.
Select or enter your clinic username and password. Use the password visibility control to check what you typed; turn it off again when someone else can see the screen. Showing the password changes its presentation only. It does not change the password or save an unmasked copy as a preference. Check keyboard language, Caps Lock and accidental spaces if login fails.
Use Switch user when another practitioner takes over. Do not work under a colleague's account: author and operator attribution depend on the signed-in person. Administrator and therapist permissions differ. An access restriction for an unassigned patient is a clinic permission issue, not a broken sensor connection.
A complete daily workflow
- Start the application with the intended sensor connected, complete authorization and sign in with your own account. Confirm that you are working in the intended clinic installation.
- In Today in clinic, review appointments. Open the correct patient and read the relevant history, latest meeting summary and practice plan. Confirm the patient's identity rather than relying on a row position.
- Open the training workspace. Check device reception and graph channels, Set Session Timer, optional camera and microphone, and any structured training plan. Confirm the patient before Start Session.
- Start the recording from the main toolbar. If using a workshop, start it separately after recording has begun. Observe signal quality and add meaningful events as the work progresses.
- Stop normally, allow media and analysis to finalize, then review the saved session. Check the exact session number, signal coverage and conversation playback. Export only the materials needed for the intended recipient.
- Write or finalize the meeting summary, update the practice plan when appropriate and update the appointment status. Close the application normally before making a consistent backup.
An appointment, meeting note and sensor recording are different records. One appointment does not automatically imply a recorded session, and a completed recording does not replace a narrative meeting summary. Link records to the correct patient explicitly where the interface provides that option.
Six interface languages and online help
The interface supports English, Hebrew, Arabic, Russian, Spanish and French. In the idle graph workspace, use the language control before entering Start Session or Review Session. The control is intentionally unavailable during recording or review. Finish or leave the active operation first.
After choosing another interface language, the application shows a clear loading/restart message and restarts automatically. Wait for the restart to finish rather than launching a second copy. Saved clinic data does not need to be translated or recreated. Names, clinician-authored notes, instructions and media filenames remain as entered; changing the interface language does not translate private clinical text.
Hebrew and Arabic dialogs use right-to-left reading where appropriate. The signal graphs retain their established axes and direction. Times, numeric editors and technical abbreviations may read left to right inside a right-to-left page. This preserves scientific notation and avoids reversing graph meaning.
The Help control opens this official website in the interface language. You can switch language in this handbook without restarting the desktop application. A browser needs Internet access to retrieve the current handbook. Search and chapter navigation work within the selected language; printing produces that language's guide.
Clinic workspace and permissions
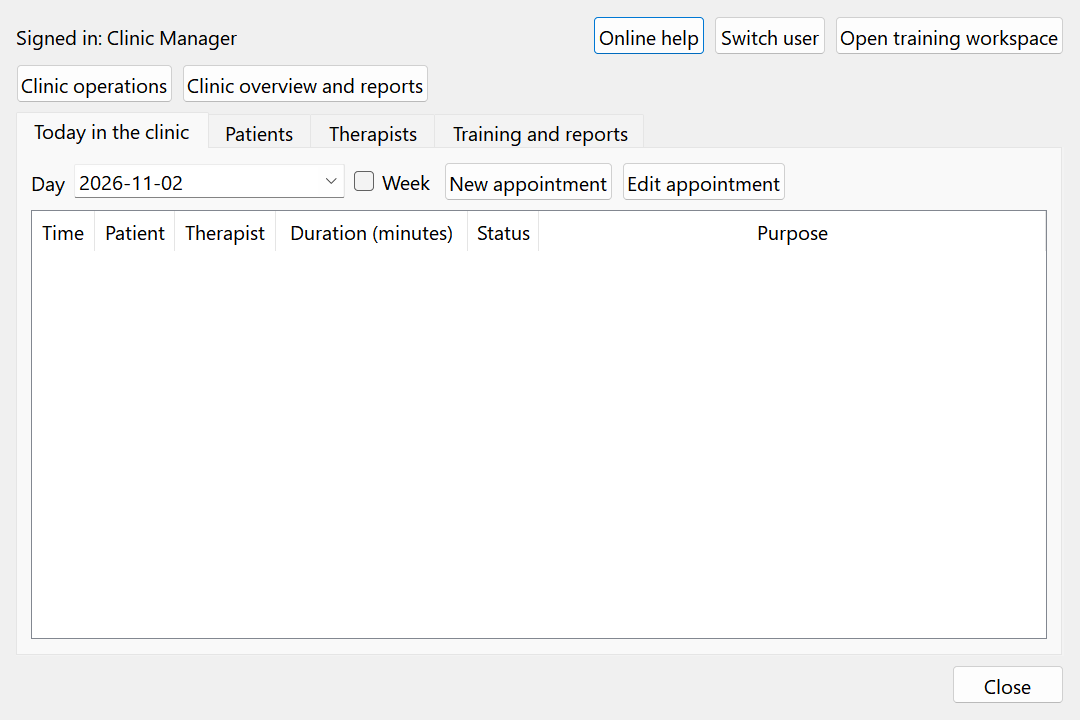
The main clinic areas are Today in clinic, Patients, Therapists, and Training and reports. The top bar identifies the current user and provides access to the training workspace and user switching. Begin clinic work here so that patient selection, permissions and documentation stay connected.
An administrator manages staff and clinic-wide access. A therapist works with patients assigned to that therapist. A patient can have several assigned practitioners, with a designated responsible practitioner. The responsible practitioner shown now is not necessarily the practitioner who performed a historical session; session operator attribution records who was signed in for that work.
Older records may have no documented operator. Treat an empty or unspecified historical operator as missing information, not as proof that the present responsible practitioner performed the session. The local role system controls application access; it does not encrypt every file or prevent a Windows administrator from accessing the computer's storage.
Adding and maintaining therapists
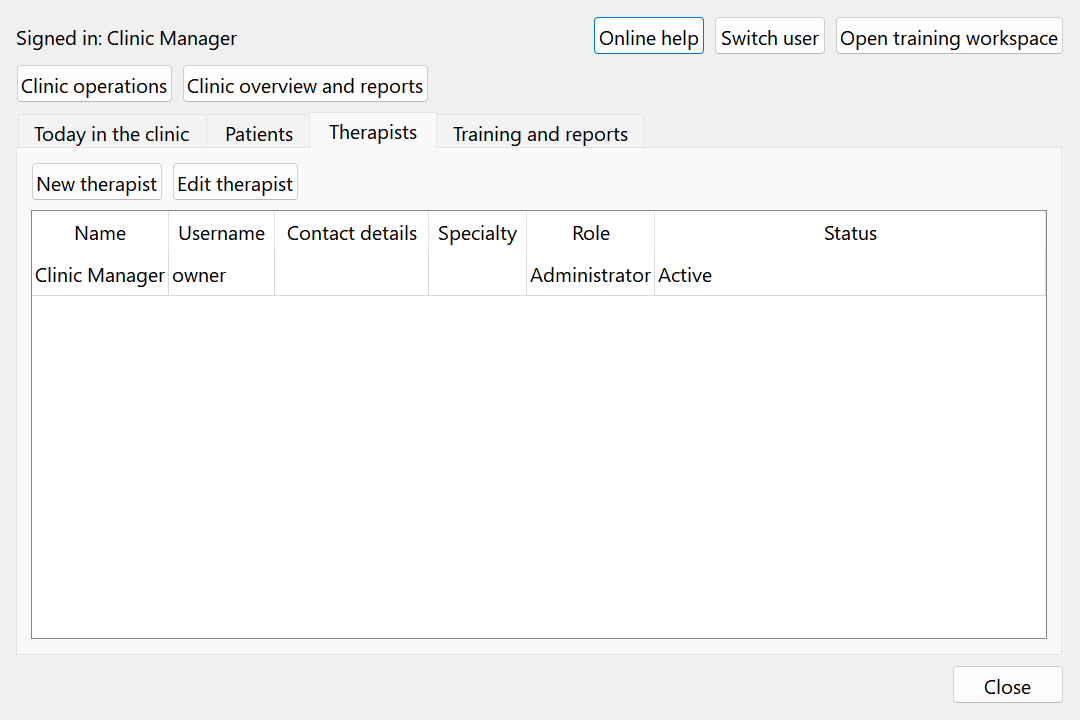
- Sign in as an administrator and open Therapists. Choose the add action for a new staff account. Enter a clear display name and a unique clinic username so colleagues can identify the account correctly.
- Enter the contact and specialty details needed by the clinic. Select the intended role: administrator or therapist. Grant administrator access only to people who need clinic-wide management functions.
- Set a password of at least eight characters and confirm it where requested. Use the visibility control to verify typing when needed. Save, then verify that the new account appears with the intended role and active state.
When editing an existing account, leaving the password field blank preserves its current password; entering a new password requests a change. Review the role and active flag before saving. The currently signed-in administrator cannot deactivate or demote that same active account through the edit operation; switch to another authorized administrator when such a change is necessary.
Deactivate a departing staff member rather than rewriting historical records under a replacement person's name. Staff identity is part of the audit context for care notes and sessions. Changing a present assignment should not be interpreted as transferring authorship of past work.
Creating and identifying a patient
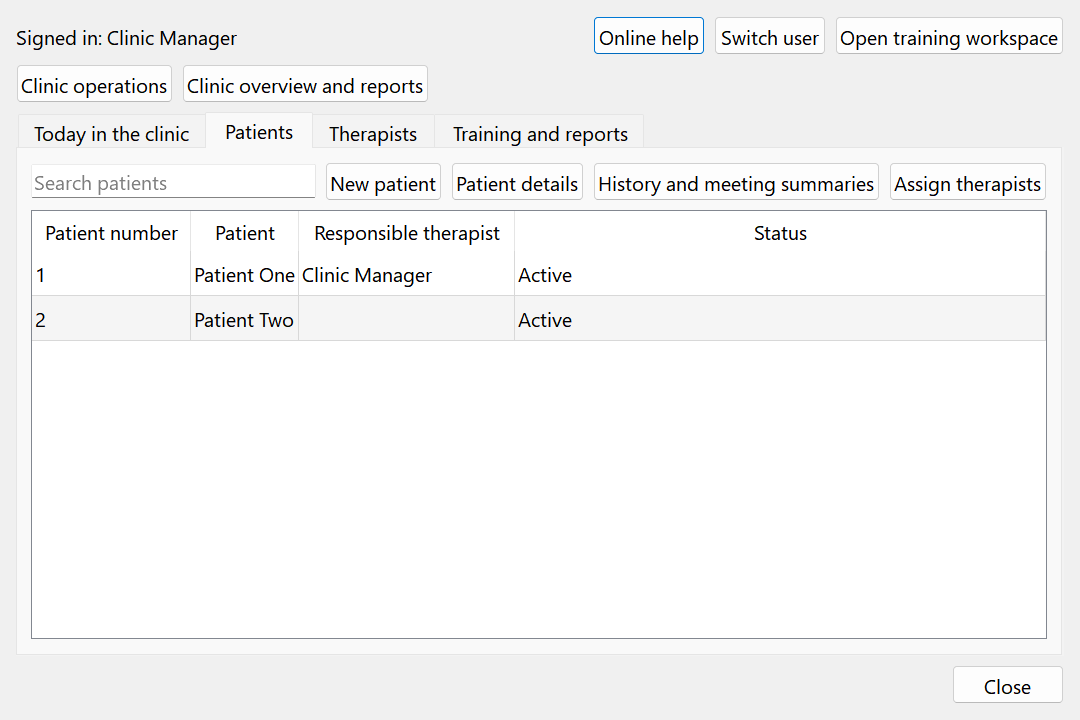
Open Patients and add a patient. Enter the name and identifying/contact details needed by your workflow, including birth date in the accepted date format where used. Use the displayed patient identifier to distinguish people with similar names. Review the record carefully before the first training session.
The patient master record contains identity and administrative details; the treatment history and meeting notes have their own dedicated areas. Avoid placing all clinical narrative in a short contact or display-name field. Store information in the appropriate section so that other authorized practitioners can find it consistently.
Use Active, Inactive or Archived according to clinic workflow. An archived or inactive patient is not a newly created person and should not be duplicated merely to resume care. Search the existing records first. An email address or similar spelling is not sufficient to prove that two patient records belong to the same person.
Save changes and reopen the record to verify the result. Read-only identifiers, version indicators and modification information are generated by the application. Do not manually edit database identifiers to rearrange patients or to change displayed session numbers.
Assigning a care team
An administrator assigns the patient to the relevant therapists. Select the patient and manage the assigned team, then mark the responsible practitioner when appropriate. Several therapists can be assigned, but responsibility should be unambiguous. Save and verify the list before asking a therapist to open the record.
If a therapist cannot see an expected patient, first confirm the signed-in account and the saved assignment. Do not create a second patient record to get around a missing assignment. Ask an administrator to correct access to the existing record.
Assignments determine current access and care coordination. They do not rewrite the actual operator on an old recording or the author of a saved summary. When reviewing progress across practitioners, consider the recorded operator, protocol and recording quality rather than assuming all sessions were delivered by the present team leader.
Appointments and the daily schedule
- Open Today in clinic and choose the relevant day or week. Add an appointment and select the existing patient and assigned practitioner. Enter the intended start time and duration; appointment duration is entered in minutes, with a default of 45 minutes.
- Add a purpose that helps the team prepare without unnecessarily exposing sensitive details on a shared schedule. Save and check the patient, practitioner and time shown in the list.
- Update the status as the visit progresses: planned, arrived, completed, cancelled or missed. A status change documents scheduling workflow; it does not create a sensor recording or finalize a meeting note.
Durations can range from 1 to 1440 minutes. The system rejects overlapping planned or arrived appointments for the same practitioner. Adjacent appointments are allowed when one ends as the next begins. If saving fails, check the practitioner's other active appointments and the selected date, not only the visible row.
This is a compact local scheduling function. Do not assume it sends reminders, synchronizes with an external calendar, processes invoices or supports simultaneous scheduling from several computers unless a separate installed integration explicitly provides that service.
Personal and treatment history
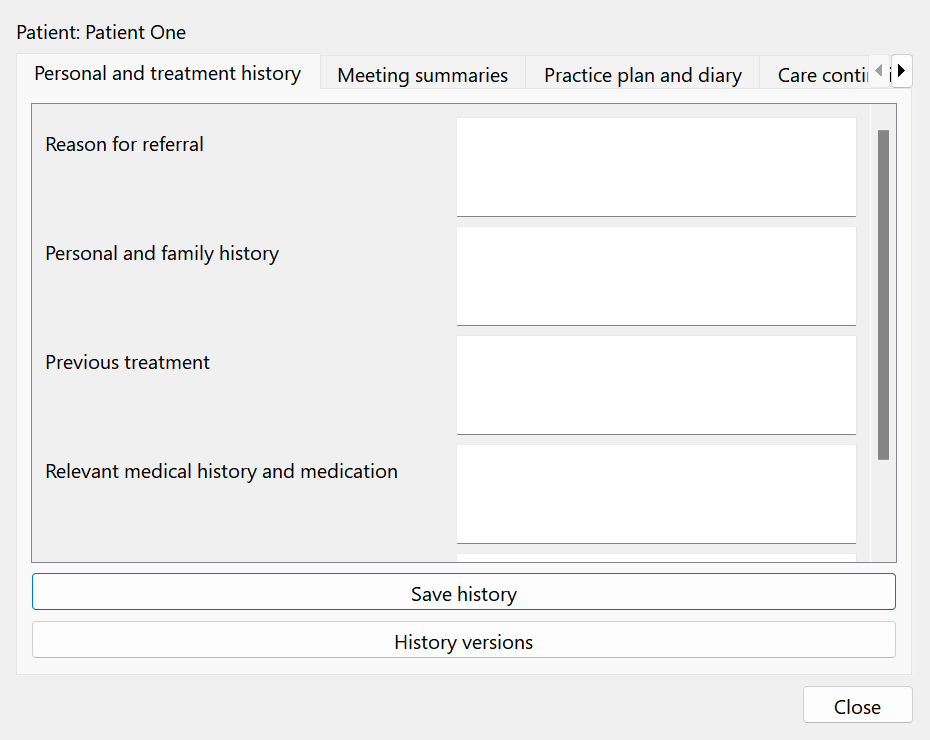
Open the patient's care details and select Personal/treatment history. Use the separate fields for referral reason, personal/family background, previous treatment, medical or medication information, and considerations relevant to training. Record concise facts with dates and attribution where needed; distinguish a patient report from a verified clinical finding.
Use Save after entering or changing the history. The application keeps attributable revisions and detects an outdated edit if another saved revision has superseded the version you opened. If a stale-edit message appears, reload the current record, compare your intended changes and re-enter the appropriate update. Do not overwrite another practitioner's work by changing files directly.
When leaving a page with unsaved changes, read the save/discard prompt. An action elsewhere in the patient record should not be used as a substitute for saving the history. After an important update, return to the page and confirm the saved text and modification information.
Meeting summaries, drafts and final records
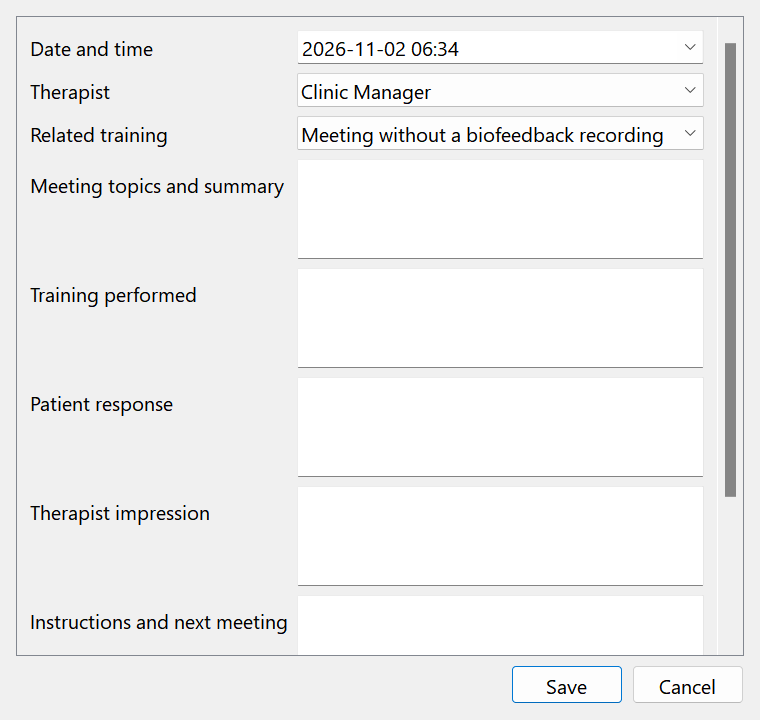
A meeting summary documents the clinical encounter even when no sensor recording was made. Create it for the correct patient and meeting date, identify the practitioner, and complete the relevant sections: topics and summary, training performed, patient response, professional impression and next steps. If linking a sensor session, choose a session belonging to that same patient.
Save a draft while writing. A draft is working documentation and is distinguishable from a finalized summary. Before finalizing, check identity, date, session linkage and factual wording. Finalizing establishes a completed revision; it should not be used simply as a way to close the window quickly.
The original author or an administrator can make permitted changes. Correcting a finalized summary requires a reason and a new finalized revision; the earlier revision remains available as historical evidence. A finalized record is not silently converted back into an ordinary draft. Enter a correction that explains what changed and why.
Authorized team members can read care documentation according to assignment and role. A present team assignment does not make every practitioner the author of existing notes. Preserve attribution when copying information into a later summary, and distinguish copied context from the current meeting's observations.
Practice plans between meetings
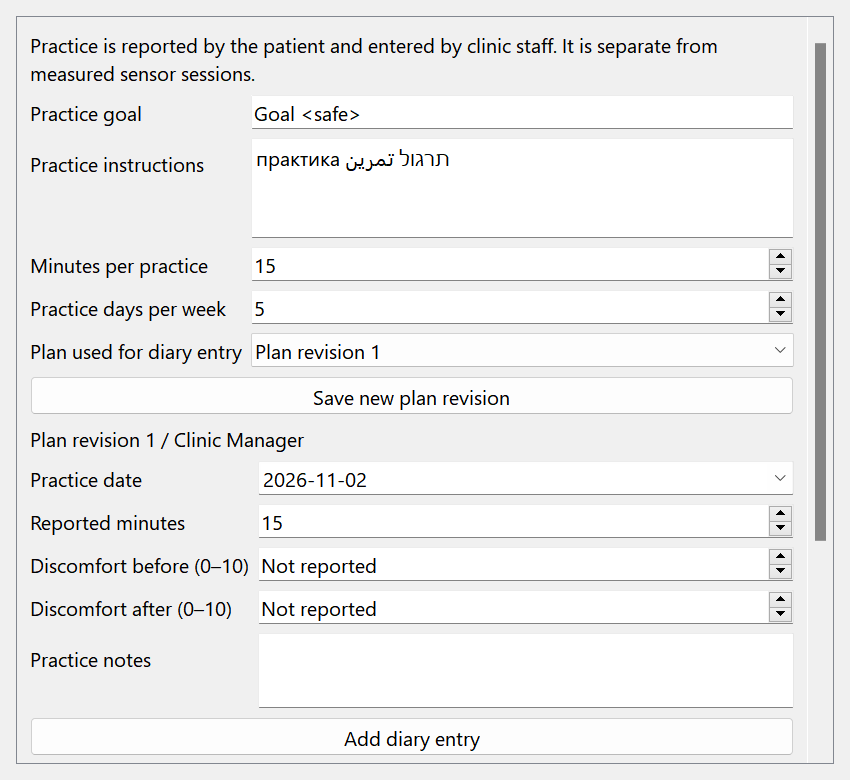
In the patient's Practice plan and diary area, enter a practical goal and clear instructions. Specify the intended minutes per day and days per week; defaults are 15 minutes and 5 days. The accepted ranges are 1–1440 minutes and 1–7 days. These fields describe an agreed plan; they do not remotely start a sensor recording.
Save a plan when it is ready to be used. Each saved revision has its own identity, allowing diary entries to remain associated with the plan that applied at the time. When changing a goal or instructions, save a new revision rather than pretending the latest plan existed during all previous weeks.
Write instructions in language the patient understands. The application's six interface languages do not automatically translate a clinician's free text. Include what to do, how long, how often, what the patient should record and when to contact the practitioner according to the clinic's chosen care instructions.
Practice diary and adherence report
Add a diary entry for the actual practice date and the applicable saved plan revision. Enter reported minutes and, if relevant, discomfort before and after practice. The date cannot be in the future. Minutes are reported by the patient and entered by staff; a diary entry is not proof of a sensor recording.
For discomfort, zero is a real reported score. The unreported value is separate, represented internally by -1, with the reported scale running from 0 to 10. Do not enter zero just because no rating was provided: doing so changes the meaning of the report.
The recent-practice report summarizes the last 28 days, including total reported minutes and unique practice dates, and can be exported to PDF. Several entries on the same day do not automatically mean several unique practice days. Compare adherence with the plan revision that was actually in use and discuss missing reports rather than inferring failure from absent data.
Saving a diary entry is separate from saving an edited plan or history. Before navigating away, save each modified area explicitly and verify that the intended text and diary entry remain present.
Graph workspace and toolbar
Open the training workspace from the clinic. The toolbar provides Start Session, Review Session, access to the clinic, line thickness, camera/video monitor, language when idle, Training studio, scrolling, full screen and exit controls. The exact available channels and additional legacy tools depend on the build and device configuration.
The camera and language controls belong beside the line-thickness controls, rather than floating in the middle of the toolbar. Icons use consistent sizing and readable labels. Read the label, not just the symbol, when a button's purpose is unclear.
Choose the signal tabs or graph groups relevant to the connected device. Channel names such as BVP, GSR, TEMP, RESP, BPHEG, pressure, resistance and CO2 describe different measurements; they are not interchangeable. A channel absent from the connected device will not become a real signal merely because its tab exists.
Observe the device identification and session time before starting. Changing the interface language does not reverse the plotting axes. Use line thickness, zoom and full screen to improve visibility without interpreting these display changes as changes to the underlying physiology or recorded values.
Connecting a sensor and checking reception
Connect the intended device using the communication method supplied for the installation. Wait for Windows and the communication layer to detect it. Confirm the actual serial number and device type, then check for changing plausible signal values before beginning a patient recording.
If BLE reception is absent, confirm the device is powered, near the computer and not already held by another program or telephone. Check the Bluetooth adapter, Windows permissions and the relevant bridge connection. Disconnect competing clients, reconnect through the approved route and recheck the graph. Do not change license files or the clinic database to solve a radio connection issue.
The device-model dropdown affects supported interpretation and presentation. It does not replace detection, create a serial number or authorize an unregistered device. If the model shown and connected device disagree, stop preparation and correct the connection/configuration before recording meaningful clinical data.
Separate connection from quality: a device can be connected while contact quality is poor or values are excluded from feedback. Adjust the physical contact and check the appropriate quality indications. Do not conceal a missing signal by changing target values or repeatedly starting new sessions.
Preparing and starting a recording
- Select the correct authorized patient. Review the identity shown in the selection dialog and confirm the intended practitioner account. Configure camera and microphone before starting if the encounter needs media.
- Set the recording duration using Set Session Timer. If using structured training, enable and validate that plan in Training studio as well. Compare both deadlines; the earlier one ends recording.
- Check reception, signal quality and disk space. Check that the desired microphone shows a live level and that the selected camera is the one actually displayed. Obtain the clinic's required recording agreement before capturing a conversation.
- Click Start Session and complete any required permission verification or selection. The application validates the plan and fresh online owner permission before creating recording artifacts. Opening Training studio alone does not start a recording.
- Confirm that the session time progresses and the interface reports an active recording. If a workshop is planned, use Start workshop separately. Monitor quality throughout rather than assuming a successful start guarantees an uninterrupted signal.
If preparation fails, read the specific message. Fix the indicated missing permission, device, patient selection or invalid plan. Do not repeatedly press Start while an earlier operation is still opening or finalizing media.
Set Session Timer and automatic stop
Enter the desired limit in HH:MM:SS. For fifteen minutes use 00:15:00; for one hour and five minutes use 01:05:00. The default is 00:15:00, and the saved value is restored the next time the application starts. Accepted values run from 00:00:01 to 23:59:59.
Edit the selected hours, minutes or seconds segment carefully. Verify the complete displayed time before recording so that 00:15:00 is not confused with fifteen seconds. The setting is locked during recording and is not a replay duration control.
Once recording starts, the timer counts toward its deadline and stops through the normal stop/finalization path. A structured plan also has an overall deadline. Whichever deadline occurs first stops the recording; the times are not added together. If a plan totals fourteen minutes and the session timer is fifteen minutes, the structured plan ends the recording at fourteen minutes.
Pausing the graph does not extend either recording deadline. If a longer session is clinically intended, configure sufficient time before starting. The workshop clock is another independent clock and does not extend the overall recording limit.
Pause, resume, stop and finalization
Graph Pause temporarily prevents incoming packages from being added through the normal graph/raw-saving and derived-analysis path. Resume continues acquisition from that point. This pause is not a synchronized freeze of every component: conversation audio continues, camera recording follows its recording timebase and recording deadlines continue to run.
Use Pause only with that distinction in mind. If you need a true end to capture, use Stop. If you need to suspend a workshop exercise while preserving the recording, use the workshop's own Pause. Document relevant interruptions with an event so later reviewers understand why graph coverage and conversation time may differ.
Stop ends recording and lets audio, camera and derived session information finalize. Wait for completion before opening or exporting the new session. Avoid force-closing the process or switching off the computer during finalization; a visible window closing is not a reason to interrupt a background file flush.
After stopping, verify the saved session in Review Session. Check its actual duration and media availability. If the machine or device failed during acquisition, retain the original files and diagnostic context; do not repeatedly overwrite or rename the session to make it look complete.
Channels, zoom, scrolling and line thickness
Use channel selection to focus the display on the measurements relevant to the session. Line thickness changes the drawing width only. Zoom and the horizontal navigation controls change which portion of the recorded or live trace is visible; they do not resample the original acquisition or improve a poor physical signal.
Smooth scrolling changes display movement. Full screen provides more working space; leave full screen using the available control before accessing hidden desktop elements. HRV height or enlarged views change the visual presentation of derived graphs, not the analysis algorithm itself.
When comparing traces, check axis labels and units rather than comparing apparent heights from differently scaled panels. A pressure channel, resistance channel and BVP amplitude cannot be treated as the same numerical quantity. Some derived measures require enough valid input and may be temporarily absent after connection, restart or an interruption.
During review, moving to a different time should change the visible window without destroying the full session data. If the display appears empty, pause replay, return to a known recorded region and confirm the selected channels before assuming the recording itself has disappeared.
Named graph views: save, apply and delete
Open Graph views from Session tools in Training studio. Use current graphs captures the available graph list and its current selections. Check the channels you want and enter a descriptive View name, then choose Save view. A name can have up to 80 characters; up to 40 views can be saved. At least one available graph must be selected.
To reuse a view, select its saved name, inspect the checked channels and choose Apply view. Selecting a name and applying it are separate actions. Applying changes which graphs are displayed; it does not clear recorded arrays, start or stop acquisition, alter graph direction or change raw signal values.
If the saved view includes a channel unavailable in the current session, the missing channel is shown explicitly and the incompatible request is rejected without silently dropping that channel. Use current graphs and save a compatible view instead. A preset created for one device is not necessarily applicable to another model.
Saving with an existing name asks whether to replace that view. Delete view removes the named display preset after confirmation; it does not delete a patient, recording or signal. If saved settings cannot be read, the application preserves the existing settings rather than silently overwriting them with an empty list.
HRV and other derived graph panels
The derived toolbar can expose S, HR, RMSSD, LF/HF, HF%, LF% and Coherence. The HRV panel provides another view of interval-derived information. These values are computed from accepted source input and are different from the raw pulse waveform. Visibility is controlled separately from whether valid source data is available.
Enable the panels you need and give the analysis enough suitable input. A missing derived value should remain unavailable; it is not replaced with a false zero merely to keep a continuous line. Check the trace and quality information if a panel contains gaps after poor contact, pauses or insufficient input.
RMSSD and other variability measures depend on interval quality. LF/HF and frequency percentages require suitable analysis windows and should not be interpreted from the same visual assumptions as instantaneous HR. Coherence is the installed software's derived feedback measure; this guide does not claim equivalence to another manufacturer's proprietary formula.
Keep the distinction between display scaling, analysis and treatment interpretation. Expanding HRV vertically or choosing a saved graph view helps readability but does not recalculate a valid clinical diagnosis. For a technical comparison, export the relevant source/derived data with its flags and units rather than estimating exact numbers from a graph image.
Events, markers and legacy question tools
Use events to describe meaningful points in the encounter, such as the start of an exercise, a contact adjustment or a reported interruption. Enter a concise factual note near the event time. Later review can use event timing to connect the narrative with the signal trace.
The Training studio also records phase, quality, workshop and task events. These automatically generated events have different meanings from a clinician's free-text note. Do not rewrite a system event's meaning as a clinical observation that was never made.
Some installations expose legacy question, question-set, type and color editors. Where available, define the intended question text, group it into the relevant set and review the configured type/color before using it. These tools organize prompts and answers; they do not provide an automatic clinical diagnosis. Save changes before starting acquisition and verify the intended set.
The legacy Safe/Unsafe transmission control represents a user preference for server data transmission. It is not a patient safety grade, a clinical outcome or an override of owner licensing. Review the installation's approved data workflow before changing transmission preferences; do not assume this icon describes the encryption status of every stored or transmitted file.
Choosing the camera and opening the monitor
Select the desired camera from the available devices before recording. The chosen device is remembered for the next launch. Compare the actual picture with the intended camera location; a similar model name is not sufficient when several cameras are connected.
If the saved camera is missing, reconnect it or explicitly select an available camera. The application should not silently substitute another physical device for an explicitly chosen missing camera. If using an automatic selection option, understand that it deliberately allows selection from the currently available devices.
Open Video monitor to inspect framing. The monitor starts as a compact window near the lower-left of the desktop, remains above other application windows and can be resized from its visible edges/corners. Resize or move it to avoid covering graphs. Its placement is independent of the patient feedback display.
Use the unobstructed camera picture to check that the intended patient is in frame. Optional face-derived information is separate from the visual preview. It does not require a yellow mask covering the face and must not be interpreted as a reliable statement about emotion, truthfulness or diagnosis.
Video recording rate and computer load
Recording attempts to use the accepted camera format and frame rate available from the selected device. The camera's supported rate depends on resolution, driver, connection and configuration; no single maximum rate is guaranteed for every camera. A marketing specification is not proof of the negotiated live rate.
Face analysis and other derived processing can operate at a different frequency from video capture. Reducing an analysis workload is not the same as intentionally recording the conversation video at that analysis frequency. Review the final media duration and motion to assess a suspected capture-rate problem.
Close unnecessary heavy applications and use a stable camera connection. If preview is smooth but saved playback is slow, test the original file in a trusted external player and compare duration, picture motion and sound. If both preview and recorded output are affected, investigate the camera format, USB throughput, driver and computer load.
Do not rename a raw file or change its declared frame rate as a substitute for solving capture timing. Keep the original recording when reporting a fault, and record which camera, selected format and application version were used.
Enabling conversation audio
Conversation recording is optional and is off until enabled. Select the intended microphone and enable audio capture before starting the session. A camera with built-in microphones may expose a microphone device separately from its video device. Check Windows microphone permission for desktop applications and make sure another program is not using the device exclusively.
Start a short test recording and speak at a normal level from the actual seating position. Watch the recording audio level meter, stop normally, then listen to the saved conversation in Review Session. A moving meter confirms arriving samples; listening to the saved file confirms that the desired conversation was captured intelligibly.
The capture path uses the supported audio format and combines simultaneous input channels into a mono conversation stream rather than appending one microphone channel after another. Two microphone channels do not inherently require duplicated speech. Distorted internal playback and duplicated capture are different problems and should be tested separately.
Graph Pause does not pause conversation audio. Make sure practitioners understand this before relying on Pause during a sensitive discussion. Stop the recording if capture must end. Follow the clinic's consent, retention and access rules for conversation media; interface language does not affect those responsibilities.
Reading the recording audio level meter
The meter shows the level of samples arriving from the selected recording microphone while capture is active. Speak and check that the indication responds. A silent room can legitimately show a very low level, so use a deliberate spoken test rather than assuming a low bar always means a fault.
A no-signal indication after approximately three seconds of absent input should prompt you to check the microphone, selected device, Windows permission and mute controls. A clipping indication means the incoming level is too high; reduce input gain or change microphone distance and test again. A high or constantly full bar is not better recording quality.
The meter is not a loudspeaker monitor and does not need to play the live conversation through the computer. Avoid adding an external live monitoring loop that causes echo or feedback. Audio playback volume for patient feedback is a separate control from microphone recording level.
For troubleshooting, make a short test, stop normally and compare internal review with an external player. If the external original sounds normal but internal review stutters, preserve the file: the fault is in playback/synchronization rather than proof that capture itself was lost.
Audio/video synchronization and listening
Saved media uses timing anchors so the conversation can align with the reviewed session. Starting, pausing, seeking, changing direction and changing review rate require different playback behavior. Use normal forward playback at 1x for the clearest conversation check before testing faster or reverse review.
Reverse graph review does not reverse spoken conversation. Audio may pause while reverse traversal is active. A dedicated conversation-listening operation can play the full audio independently of the current graph window; do not run two overlapping speech players and interpret the resulting echo as duplicated capture.
Patient feedback sounds, workshop video/audio and conversation review serve different purposes. Confirm which player is producing sound before adjusting volume or reporting a fault. A sound cue generated for breathing is not the recorded microphone conversation.
If synchronization seems wrong, pause review, choose a known time/event and resume forward at 1x. Compare the original media externally. Record whether the problem occurs only inside BS_Training, only in an exported file or in both; that distinction is essential for identifying the failing part of the workflow.
Selecting the exact saved session
Open Review Session and select the intended patient and recording. The Session Number is the real saved session identifier, not a temporary visual row count. Newer sessions can appear above older sessions; the upper row is therefore not automatically session 1.
Check the session number, date and duration before opening. Sorting a table or clicking a different row must not change the identity of the selected recording. When opening Clinical Intelligence, confirm that its selected-session details refer to the same session you chose, rather than a previously visited or last-listed record.
Review uses saved data; it does not begin a new microphone capture or create a fresh sensor recording. A missing camera/audio flag means there may be no corresponding media for that session. Check the original recording options and file availability rather than assuming every historical session includes conversation media.
If you need all-session progress, open the patient-level progress report. A report based on all eligible sessions is different from the analysis of the currently selected recording. Keep those scopes separate when discussing a patient's progress.
Play, pause, speed, direction and seeking
Use Play to advance through the recording and Pause to inspect a moment. Available review rates are 0.25x, 0.5x, 1x, 2x and 4x. Select forward or backward direction according to the region you want to inspect. Direction changes the movement through time; it does not mirror graph axes or rewrite samples.
Use the timeline/navigation controls to reach a known position, then resume if desired. The complete recorded vectors remain the source for replay. Pressing Play is not intended to clear the previous session's content or discard data outside the current visible window.
When examining speech, return to forward 1x playback first. Reverse or accelerated graph review may not provide ordinary conversation playback. Pausing and seeking can legitimately stop or reposition media while preserving the session data.
Avoid interpreting a brief seek or media-buffer transition as a new recording. If repeated rapid controls produce an error, note the exact session number, rate, direction and command sequence, then preserve the recording and application logs. Do not delete the session as the first troubleshooting step.
Clinical patient details and analysis tabs
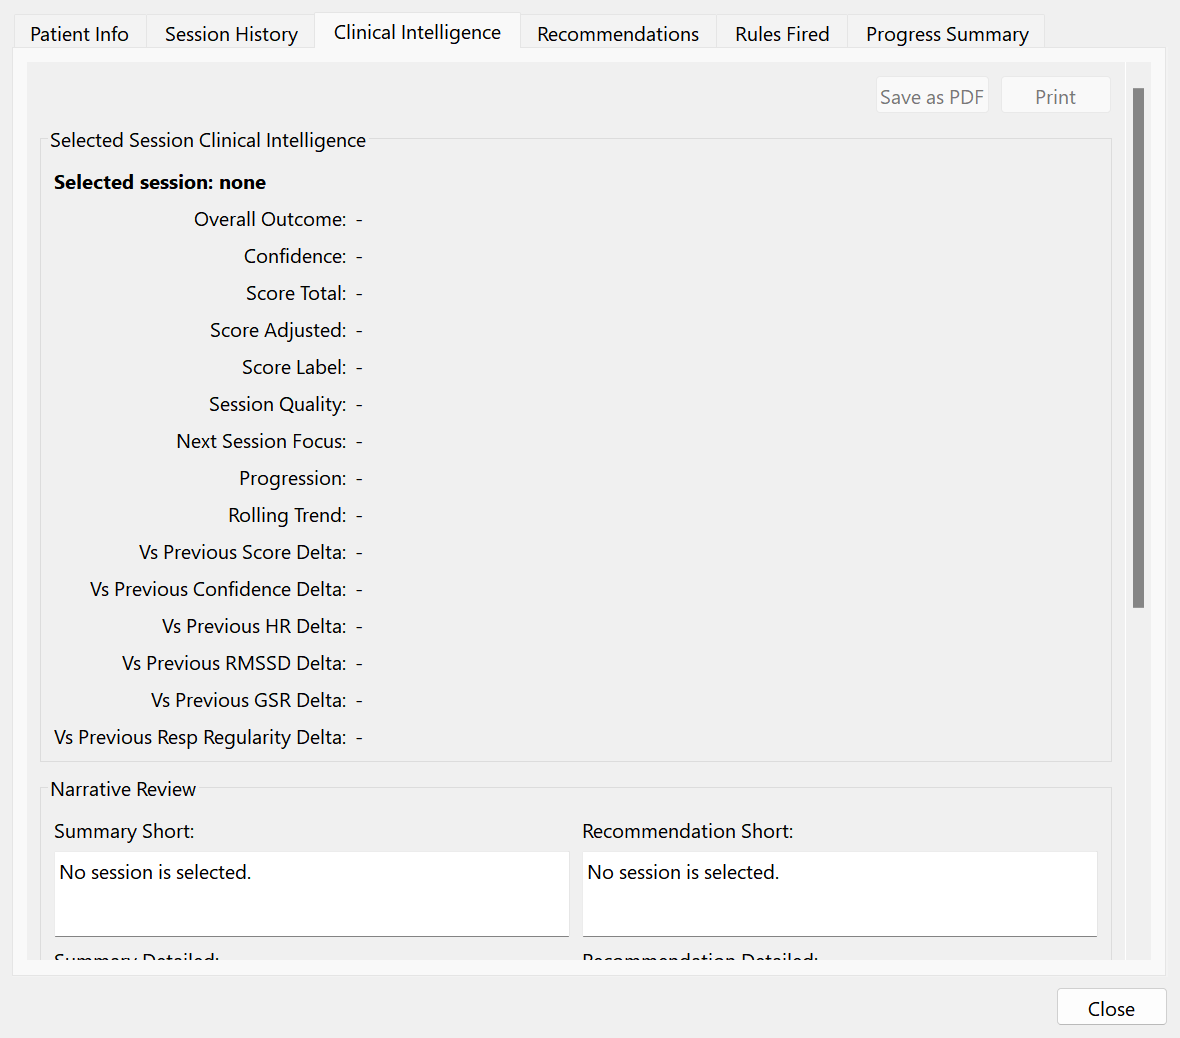
Clinical Patient Details brings together Patient Info, Session History, Clinical Intelligence, Recommendations, Rules Fired and Progress Summary. Begin with identity and the selected-session details. A row's visible position and its saved session number are different things; verify the actual identifier when comparing tabs.
Session History lists the available recordings and their duration, outcome, confidence, progression and rule information where present. Selecting a row should update the selected-session panel. Opening the analysis should use that selection, including when the first row rather than the last row is chosen.
Clinical Intelligence presents the software's derived interpretation. Recommendations provide supporting suggestions. Rules Fired explains which rules contributed, and Rule Version identifies the rule set used. These areas help a practitioner inspect the basis of an output rather than treating a label as a complete clinical conclusion.
Read signal availability and reliability first. A short or poor-quality recording can have limited analytical value even if a rule produced a label. Compare the narrative with the raw traces, events, actual training protocol and meeting context before using it in care documentation.
Duration, quality, confidence and outcomes
The clinical history can indicate whether HR data, HRV data and a camera file exist, and whether the duration is suitable for the applicable analysis. These are different checks. Having a camera file does not prove usable HRV, and a recorded duration does not prove continuous good contact.
An Invalid session, Poor data quality or Unreliable result describes analytical eligibility or confidence. It should not automatically be interpreted as deterioration in the patient's condition. Read the reason, examine signal coverage and consider interruptions before comparing scores.
Missing derived values can result from absent channels, insufficient valid samples, rejected intervals or a short acquisition. Do not manually fill a missing metric with zero: zero is a number with a different meaning. Keep unavailable information visibly unavailable.
Confidence and progression are software interpretations based on available data and rules. They do not certify a diagnosis, treatment response or measurement accuracy. When exporting or discussing a result, include relevant quality limitations and avoid ranking sessions that were recorded under incompatible conditions.
Progress across all patient sessions
Open the patient's progress report to see the training history across recordings, including sessions performed by different practitioners. Confirm the patient and the report's scope before exporting. The current selected row is not the only session included in an all-session report.
The history may show invalid or low-confidence recordings while excluding them from a numerical trend. Progress comparisons require at least two eligible, comparable sessions with appropriate duration, finite scores and usable confidence. Two rows in a list do not necessarily provide two valid comparison points.
Compare protocol, operator, device, quality and circumstances. An apparent improvement can reflect better contact, a different exercise or a longer usable recording. Read the supporting dates and quality information, and combine the report with meeting notes and the patient's reported experience.
Export the report to PDF when a stable review copy is required. Verify the patient's identity, dates and language in the exported document. A PDF is a snapshot, not a live connection to later corrections or additional sessions; generate a new report after meaningful data changes.
Training studio: purpose and working areas
Open Training studio from the graph toolbar. Its four working areas are Training plan, Session tools, Patient display and Workshop. A visible state message identifies whether structured training is inactive, ready, recording or reviewing. Check this state before assuming a button has started anything.
The Training plan defines baseline, training and recovery durations, breathing guidance, HR targets, templates and authored instructions. Session tools provides views, events, attention exercises and derived reports/exports. Patient display controls a separate participant-facing window. Workshop builds and runs a sequence of timed activities.
The studio is an optional layer over the main recorder. Saving a template, opening the participant display or editing a workshop does not start sensor recording. Start Session on the main toolbar starts the recording; Start workshop is a separate explicit action after recording has begun.
Prepare settings while idle. Many configuration controls are intentionally locked during recording and review so the stored protocol cannot change underneath an active analysis. If a control is unavailable, read the global state and finish the active operation before attempting to edit it.
Enabling a structured plan
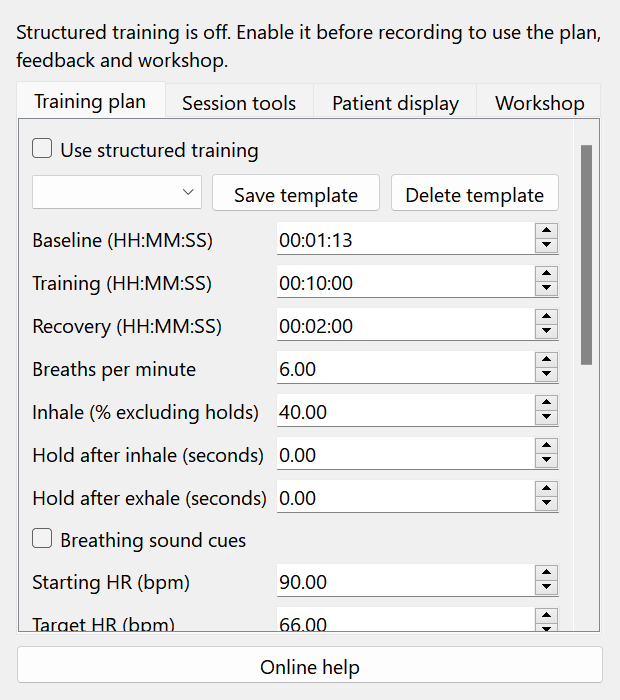
Structured training is off by default. Check Use structured training before starting a session that should use the planned phases and feedback. Ordinary recording remains possible while the option is off, but the structured plan, workshop and attention functions are not thereby running.
- Open Training plan while idle and enable the structured option. Check phase times, breathing settings and HR targets. Review the intended language of the patient instructions.
- Confirm Set Session Timer in the main workspace is long enough for the intended plan. Resolve validation messages before starting acquisition.
- Start Session from the main toolbar and confirm that the studio reports recording. Open the patient display if needed. Start a workshop separately if one is part of this encounter.
Loading a saved template can restore a disabled structured state. Always recheck the enabled indicator after loading. Do not infer that the plan is active merely because its numeric fields contain plausible values or because a template has a familiar name.
Baseline, training and recovery durations
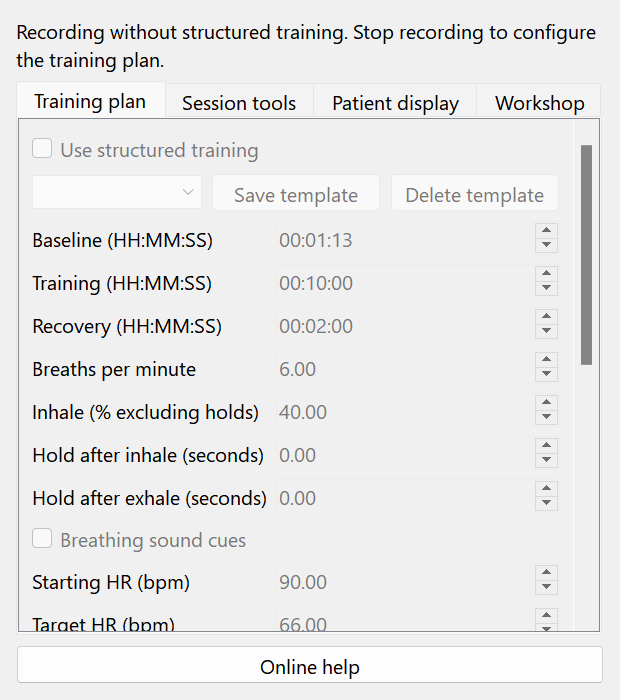
The structured plan progresses automatically through Baseline, Training and Recovery. Default durations are 00:02:00, 00:10:00 and 00:02:00, totaling 00:14:00. The phases represent the plan's timeline; workshop role labels are a separate classification.
Enter each duration in HH:MM:SS. A phase can range from 00:00:01 to 08:00:00, and the combined plan must remain below 24 hours. Use the selected time segment carefully and verify the total before starting. Idle numeric edits are saved automatically.
During Baseline, collect the intended reference period according to your chosen protocol. During Training, the configured breathing guidance and feedback apply. During Recovery, the software observes the configured recovery behavior. The program does not decide whether the clinical content of those phases is appropriate for the patient.
When the full enabled plan expires, recording ends through the normal Stop path, unless another stop occurred earlier. A workshop that has not yet finished can therefore end partially if the plan or session timer expires first. Plan the overall duration before the encounter.
Understanding the three clocks
There are three independent timing functions: the main recording limit, the structured-plan timeline and the workshop step clock. The first two can stop the recording. Their deadlines are evaluated independently, and the earlier one wins. Workshop completion alone does not normally end the recording.
Graph Pause does not extend the recording limit or the structured-plan deadline. Workshop Pause freezes its own steps and media but leaves acquisition and the two recording deadlines running. This distinction matters during explanations, contact adjustments and patient breaks.
Example: a fourteen-minute structured plan and fifteen-minute session timer allow at most fourteen minutes of recording. Starting a five-minute workshop ten minutes into that recording leaves only four minutes before the plan ends. Pausing the workshop for a minute does not create an extra minute in the recording.
For a planned break, decide whether to continue recording, stop and create a separate session, or use a longer preconfigured plan. Document what happened with events and meeting notes so a later reviewer can interpret gaps and partial workshop results accurately.
Breathing rate, inhale share and holds
Choose a rate from 2 to 30 breaths per minute. A cycle lasts 60 divided by the rate, in seconds. The inhale share is 10–90 percent of the moving part of the cycle. Optional holds after inhale and exhale each range from 0 to 20 seconds, and their sum must be shorter than the whole cycle.
Without holds, 6 breaths per minute gives a ten-second cycle. An inhale share of 40 percent produces four seconds of inhale and six seconds of exhale. With holds, subtract both holds from the cycle first, then apply the inhale share to the remaining moving time.
Optional breathing sounds occur during the Training phase. The guide is a timed cue, not a measurement proving that the patient followed the breathing pattern. Compare any actual respiratory signal separately when the connected hardware provides it.
Choose settings according to professional judgment and patient comfort. Do not use the permitted numeric range as a recommendation to use its extremes. If guidance is uncomfortable or inappropriate, stop or adjust the protocol while idle rather than asking the patient to force compliance with an arbitrary target.
HR targets and feedback calculation
Starting HR and Target HR must differ, and both must be within 20–250 bpm. The feedback progress is 100 multiplied by current HR minus starting HR, divided by target HR minus starting HR, limited to 0–100 percent. The same formula supports a rising or falling target.
For a target from 90 to 70 bpm, an eligible current HR of 80 bpm gives 50 percent progress. Values beyond the target are capped at full progress; values outside the intended starting direction are capped at zero. This normalization describes the configured goal, not a standardized clinical outcome scale.
Only eligible live input drives this feedback: finite HR in range, adequate amplitude, no relevant rejection flag and sufficiently fresh timing. The amplitude requirement is P1 of at least 100, or 150 for AI-HRV. Input absent or around three seconds old becomes unavailable for feedback.
Raw graphs may still display samples that feedback excludes. If the participant view becomes neutral, check contact, device reception and sample quality before treating it as a program failure. Do not lower the target simply to hide an unavailable signal.
Recovery target and confirmation hold
Recovery confirmation applies within the plan's Recovery phase. The target must remain satisfied for a continuous configured hold, from 1 to 120 seconds, with a default of 10 seconds. A momentary target crossing is therefore not the same as confirmed recovery.
An out-of-target sample, invalid input or a gap resets an unconfirmed continuous streak. Missing data is distinguished from a target that has not yet been confirmed. Read the state rather than assuming that an empty or neutral indication means the patient failed.
Recovery feedback is based on the configured HR goal and eligible input. It does not independently prove general physiological recovery or treatment success. Note interruptions and poor contact so that a later report can be interpreted with its actual recording conditions.
Worked example: a first structured recording
This example demonstrates software operation, not a recommended treatment. While idle, enable structured training and retain the default phase durations of 00:02:00, 00:10:00 and 00:02:00. Confirm the total is 00:14:00. Set the main session timer to 00:15:00, so it does not truncate this example plan.
Choose distinct HR start/target values appropriate to a demonstration and valid breathing settings. For the arithmetic example only, 6 breaths per minute with 40 percent inhale and no holds produces a ten-second cycle split into four seconds inhale and six seconds exhale. Review the patient-language instructions and save any edited text.
Select the patient display monitor, then start the main recording and confirm the active state. Open the participant view. Baseline begins on the structured timeline, followed automatically by Training and Recovery. Eligible live HR drives feedback; missing or stale input makes the display neutral rather than inventing progress.
If demonstrating the five-minute workshop, start it early enough to finish before the fourteen-minute plan ends. Its role labels do not automatically align with the plan's phases. Pause and resume the workshop once to see that its own clock stops while the main recording time continues. Add an event describing this demonstration interruption.
Let the plan stop the recording or press Stop deliberately, wait for finalization, then open the exact saved session. Inspect phase timing, events, coverage and any partial workshop status. Listen to conversation audio if it was enabled. Export a report only after checking that it represents this session and its actual completion/quality state.
Instructions in six languages
Select the phase and instruction language, then enter the intended patient-facing text. There are separate authored language slots for all six supported languages. The interface can display those slots, but it does not automatically translate clinical instructions written by the practitioner.
Use Save instructions or allow the short automatic-save delay to complete. Before starting, switch to the language the patient will actually see and verify that the correct text is present. A translated interface does not guarantee that all authored instruction slots have been filled.
Write clear actions and timing rather than ambiguous abbreviations. Keep the wording appropriate for the selected phase and ensure it agrees with the exercise that the therapist will deliver. If a template is shared within the clinic, check every language needed by that clinic before using it with a patient.
Saving, loading and checking templates
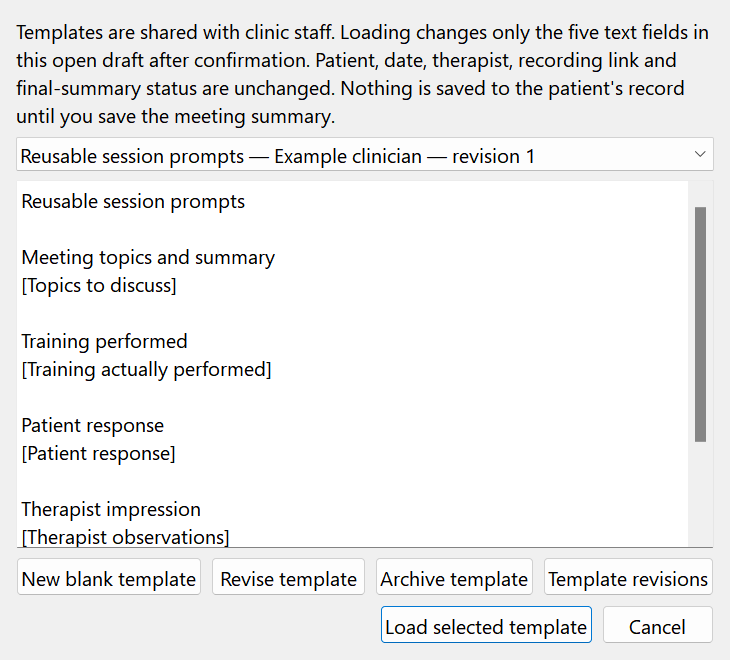
Save template stores the complete current plan, including the structured-enabled state, sound preference and authored instructions. Use a descriptive name that distinguishes the purpose and version. Names can contain up to 80 characters, with up to 100 saved templates.
Loading restores those settings; it is not a command to start recording. Check the enabled flag, phase durations, targets, breathing settings and patient instruction language after loading. A template saved while structured training was off restores that off state.
Templates are unavailable for modification during recording and review. Stop or leave review before changing the protocol. Reusing a template supports consistency, but it does not prove that two sessions are analytically comparable if the actual inputs, device, quality or delivered activities differ.
For a deliberate protocol change, use a clearly distinguishable template name or documented revision. Do not silently change a familiar template and later assume older sessions used the same settings. Recorded session details should be the basis for historical interpretation.
Opening the separate patient window
The Patient display area opens a separate participant-facing window while the practitioner keeps the control workspace available. Select the desired monitor and mode, then open the display. On a two-screen computer, choose the patient monitor explicitly so you do not have to drag the window for every session.
Monitor choice and geometry are remembered. Use full screen for a dedicated patient screen and Esc to leave full screen. If the preferred monitor is disconnected, the window falls back to an available screen without permanently replacing the saved preference for the missing monitor.
Check the actual screen before beginning: confirm that the patient sees the intended view and that clinic notes or identifying information are not unintentionally exposed. The camera's Video monitor is a different window with a different purpose.
Closing or changing the participant display does not by itself mean recording has stopped. Always read the main recording state. Prepare the view while idle, then verify active feedback after acquisition has started and eligible input is available.
Basic feedback, scenes and local media
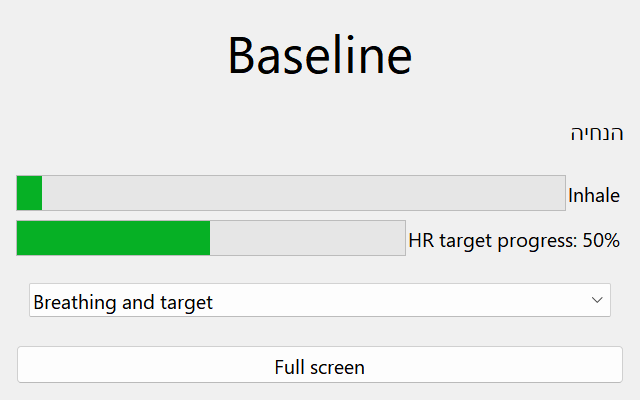
Available modes include a basic feedback display, scenes such as light, balloon or garden, and local video, image or audio. Choose the mode that fits the planned activity. Scene movement reflects the current eligible feedback calculation rather than a direct measurement of emotion or a proprietary clinical score.
For local media, select the actual file and use the explicit Play control where applicable. Selecting a filename alone is not necessarily playback. Keep source media available at its saved location; copying a workshop description does not automatically copy every referenced video or audio file.
When the signal is stale or invalid, feedback becomes neutral and linked media volume is muted. Images can be hidden and scenes can become grey/neutral. This is deliberate quality handling, so first check the signal rather than raising volume or repeatedly reopening the window.
Patient-media volume, breathing sound cues and recorded conversation playback are separate audio sources. Test the intended combination before a live session to avoid competing sounds, echo or an unexpected restart of unrelated media.
Building a timed workshop
A workshop is an ordered sequence of 1–200 steps. Each step can last 00:00:01–08:00:00, with a total shorter than 24 hours. Add steps in the intended order and choose a role such as custom, baseline, challenge or recovery. These roles classify workshop activities; they do not replace the structured plan's phases.
For each step, enter the title and instructions in the needed language slots and optionally choose local video. Check that a required file exists before saving or starting. Workshop content should explain what the patient should do and what the therapist must provide separately.
Save/export a workshop definition as JSON when a reusable file is needed. On import, relative media paths are resolved from the imported file's directory. The JSON file does not bundle the referenced media; transfer the relevant media files as well and verify paths on the receiving installation.
Editing is locked during an active run or review. Prepare and validate the workshop while idle. Missing selected video prevents starting the affected configuration; choose a valid file or remove the optional media intentionally rather than expecting an unrelated video to be substituted.
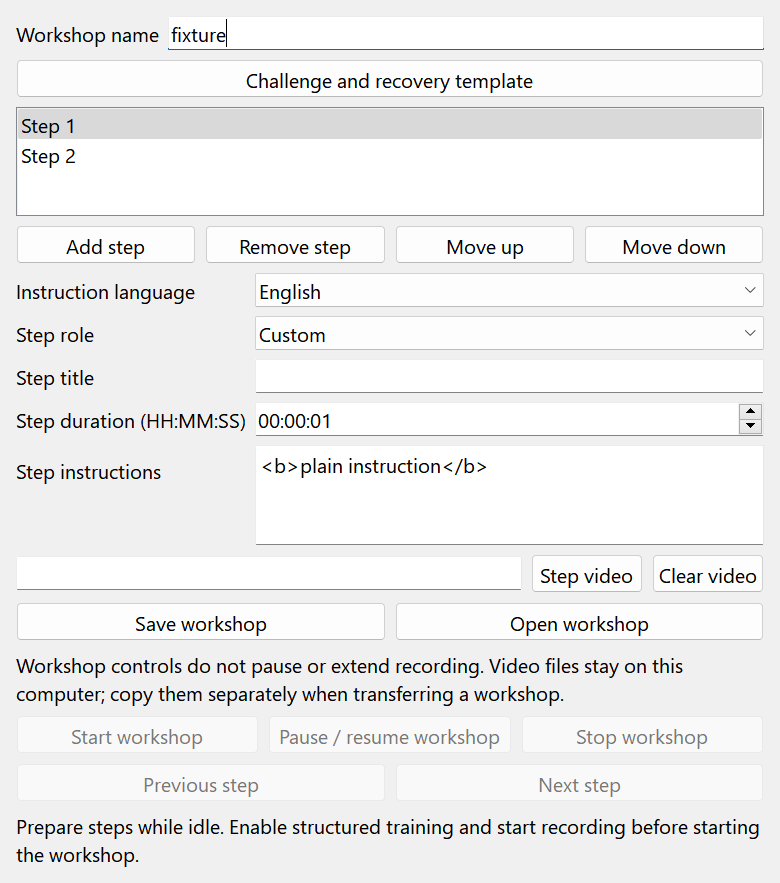
The baseline/challenge/recovery profile
The supplied challenge profile creates a sequence with two minutes of baseline, one minute of challenge and two minutes of recovery, totaling five minutes. Replacing an existing workshop requires confirmation. Review the resulting steps and instructions before running it.
The therapist supplies an appropriate challenge activity. The software does not choose a universally safe challenge, deliver a complete clinical protocol or infer that a recorded challenge was performed as intended. Add factual events when the delivered activity differs from the plan.
Workshop baseline/challenge/recovery roles are independent of the structured plan's Baseline/Training/Recovery timeline. A workshop's recovery step can occur during a different plan phase if you start it later or pause it. Align the timelines intentionally if your chosen protocol requires alignment.
Starting, pausing and completing a workshop
- Enable structured training, validate the plan and workshop, and start the main recording. Confirm the studio shows an active recording before pressing Start workshop.
- Start the workshop explicitly. Watch the current step, remaining time and participant view. Use the intended language for step instructions and check that optional media plays from the correct file.
- Use workshop Pause to freeze its own step timing and media. The recording, audio capture and overall recording deadlines continue. Resume the workshop deliberately after the interruption.
- Previous and Next move between steps and restart the selected step's visit. If the workshop was paused, navigation retains that paused state. Repeated visits are distinct in the recorded workshop results.
- Stop the workshop or let it complete. The earlier patient-display mode is restored without automatically resuming unrelated media that had been playing before the workshop. The main recording continues until its own stop/deadline.
Stopping the recording finalizes an incomplete workshop as partial. Starting another run creates a distinct run identity. Do not merge several attempts into one supposed uninterrupted protocol when interpreting timing, coverage or results.
Notes, automatic events and time navigation
Use Session tools to add a meaningful event during active recording. Write a short observation describing what actually happened, such as contact adjustment, exercise start or a patient-reported sensation. Events provide context but do not change the raw physiological samples.
The structured system also records phase changes, quality transitions, workshop activity and attention-task information. During review, select an event to navigate to its recorded time/sample. Older recordings may use approximate timing when exact newer metadata was not available.
Do not assume that a visible event means uninterrupted good-quality data existed around it. Check the nearby trace and coverage. Preserve the distinction between a planned step, its actual visit and a clinician's observation of what was delivered.
Attention exercises and their controls
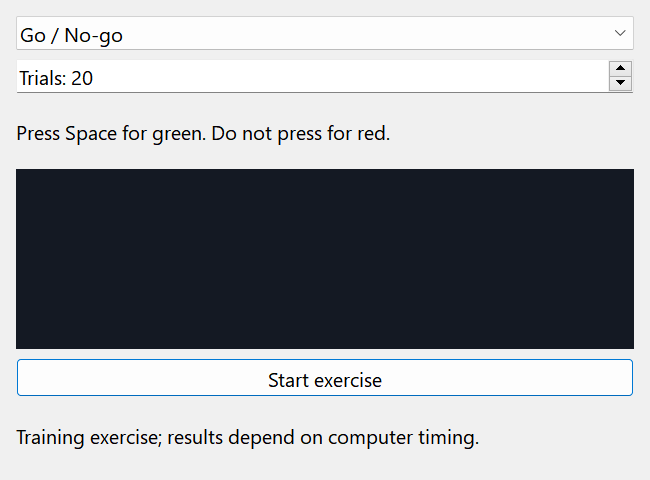
The Go/No-Go exercise uses Space for a green stimulus and requires no response to red. The color-word exercise asks for the ink color, using 1 for red, 2 for green, 3 for blue and 4 for yellow, while ignoring the word's meaning. Explain and practice the controls before collecting an intended run.
Choose 10–100 trials. Response timing starts from the first displayed stimulus, with a 1.5-second response window. Late or duplicate responses are not treated as additional valid answers. Stopping a task cancels the current trial while preserving completed partial results.
Use these exercises only in the appropriate active structured state. Their results are descriptive software measures; this desktop setup is not a calibrated laboratory reaction-time system or a validated diagnostic attention test. Keyboard, display timing and the patient's understanding can affect results.
Record interruptions, assistance or misunderstood instructions. Do not interpret a cancelled or partially completed task as equivalent to a complete standardized run. Attention-task sessions are excluded from the conservative structured comparison path described in the comparison chapter.
Phase and workshop reports
The phase report summarizes recorded eligible values and timing for the structured phases. Read sample counts, mean, minimum, maximum and coverage together. An average based on a small valid portion should not be interpreted as representative of an entire long phase.
Coverage uses bounded time weighting rather than pretending a single last value remained valid indefinitely. Workshop visit summaries hold fresh HR only for a limited interval, around three seconds; workshop-paused time is excluded from its active timing. Repeated visits to a step remain separate visits.
Export a PDF when a shareable snapshot is needed, and verify identity, session number, language and completion state. A report derived from a partial recording remains partial even if it is successfully exported. Neither phase labels nor descriptive statistics establish clinical efficacy.
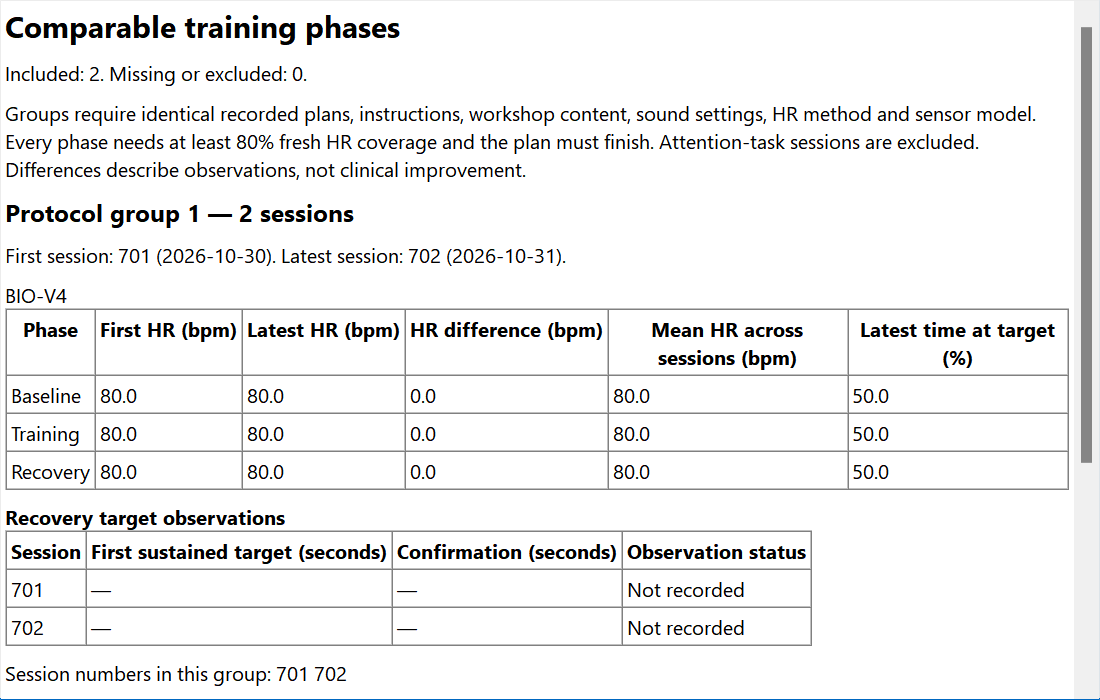
Comparing structured sessions fairly
Structured comparison requires at least two completed compatible sessions. Compatibility considers protocol-related settings such as device model, phase plan, authored instructions, sound and workshop configuration. Each phase needs at least 80 percent eligible coverage for this conservative comparison route.
Attention-task sessions and incomplete workshop runs are excluded from this comparison path. A session can remain visible and reviewable while not qualifying for a comparison. Read the exclusion reason instead of trying to force a result by deleting quality information.
These gates improve consistency but do not amount to clinical validation. Even eligible sessions can differ in patient state, practitioner behavior, contact quality and setting. Read the underlying traces and notes, and report the conditions under which a change was observed.
Do not confuse this structured comparison with the patient-level all-session progress report. They have different scopes and eligibility rules. Use the report suited to the question and identify which report produced a given conclusion.
Beat CSV and technical timing
Beat CSV exports a full-record snapshot for technical inspection. It preserves source P1 and rejection/adjacent-exclusion information so a reviewer can distinguish usable input from flagged intervals. Exporting a CSV does not automatically clean artifacts or turn every interval into a normal-to-normal interval.
The relevant source sampling grid is 60 Hz; it is not a precision timestamp from an independent device clock and should not be described as such. Timing resolution and source quality limit what can be inferred from these values.
Technical names such as IBI, HRV and RMSSD identify different quantities. Retain column headers, units and flags when sharing a file. Do not delete unfavorable rows merely to improve a statistic. The export is not a claim of external software certification or equivalence to a proprietary validated analysis pipeline.
Exporting video with conversation audio
Select the correct saved session, choose the media export destination and select whether conversation audio should be included. A combined MP4 uses the saved video and selected conversation audio with their timing alignment. Confirm that both source media files exist before requesting a combined export.
A video-only export omits conversation audio; a WAV export preserves the recorded conversation as an audio file. Check the chosen options rather than assuming that a file with an MP4 extension always contains the desired sound. Multimedia export depends on the supporting tools included with the installation.
Wait for completion and play the exported file from its actual destination in an external player. Check the beginning, a middle point and the end for intelligibility, duration and synchronization. Export uses a temporary output before replacing the final destination; cancellation should not be treated as a completed export.
Exports are copies for a stated purpose. Keep original session media with the clinic backup and control access to exported conversation files. An exported video is not a complete clinic backup and does not include every history entry, meeting note or structured result.
Data files, graph images and session archives
Use the data export dialog to choose the destination and the intended categories: raw signal data, IBI, HRV, camera and events where available. Mark/unmark controls help choose a subset. Verify the selection and existing-file warning before continuing; overwriting a prior export can remove the previous copy at that destination.
Graph PNG export saves a picture of the displayed graph. It is useful for illustration but is not a numeric dataset. CSV export provides tabular data for technical use; preserve its units and column names, and check spreadsheet import settings so decimal and date formatting are not silently changed.
Export from DB and Import to DB operate on session archive workflows; import selects a .bst file and requires appropriate administrator permission. Validate the patient/session identity after import. Do not assume a session archive contains all clinic staff, treatment histories, notes, preferences or externally referenced media.
A full clinic backup is a separate operation described below. Before relying on any export as an archive, test restoration on a separate supported copy and check the actual content. A successful file save is not proof that all clinically relevant linked information was included.
Where application and session information is stored
The local installation uses application settings and a SQLite clinic/session database, commonly named BS_Training.ini and BS_Training.db in the application's working location. Session audio, video and derived sidecar files are separate linked artifacts. Their exact paths depend on the configured installation and selected export destinations.
Structured training uses session-bound derived JSON, with names such as session_<id>_training.json. It checkpoints periodically, approximately every five seconds, and associates the file with a specific session identity. A sidecar is not interchangeable with another recording simply because the file can be opened as text.
Some working folders can be shared with other BioSignals software, including Polygraph. Never empty an entire sessions folder to reset just one application. Ask support to identify the exact files and ownership before any cleanup that could affect another product.
Referenced patient media and workshop media may live outside the application folder. A backup that includes the database but omits those files can preserve references while losing playback. Record the installation's actual locations and include the relevant linked files in the backup plan.
Making and checking a complete backup
- Stop active recordings and allow media finalization to complete. Close BS_Training normally so its database and settings are not changing during the copy. Confirm that no second instance is still writing.
- Copy the application data needed for recovery: the matching database, settings, session media, derived sidecars and any external media referenced by patient displays or workshops. Preserve the relative relationships and record the original paths.
- Store the copy in a clearly dated protected location separate from the working installation. Keep access appropriate for patient records and conversation media. A software source backup on GitHub is not a backup of private clinic data, and private clinical files should not be added to a source repository.
- Verify that files exist and can be read. For an important backup, compare file counts/sizes or checksums and perform a restoration check in a separate supported location without overwriting the active clinic.
- Record when the backup was made and which installation it covers. Keep more than one generation according to the clinic's retention policy so an unnoticed mistake is not immediately copied over the only recovery point.
Do not restore an old database over current work casually. The database and its media must belong to a consistent point in time. A local restore does not recreate or bypass the Internet server's owner/hardware registration.
Updates, clean-start testing and data protection
Before updating, make a verified backup and stop the application. Use the approved complete application package or deployment process. Keep current clinic data and preferences unless a specifically planned migration requires a change. An updated executable should not silently reset the clinic.
A clean-start test is a deliberately separate operation that removes or relocates local clinic state. It is not an ordinary troubleshooting step and should only be performed with an explicit backup and an identified scope. The goal must be clear: a new local database, new local preferences and a new owner binding are different things.
Do not delete shared folders, unrelated product data or Internet customer registrations when resetting a local test installation. A clean local installation still needs valid hardware and owner verification. Deleting files cannot turn an unregistered sensor into an authorized one.
After an update, test login, an existing patient, a short new recording, media review and the online help link. Sensor-dependent acceptance requires a real connected device; a translated screenshot or automated test alone does not prove a complete physical recording workflow.
Privacy, authorship and shared-computer use
Use a personal staff account, lock Windows when leaving the workstation and switch users when responsibility changes. Grant patient access through explicit assignments. Keep exported reports and conversation recordings in protected destinations rather than on an openly shared desktop.
The clinic database, history revisions, meeting notes and session operator fields serve different attribution needs. Avoid editing raw database files or copying another practitioner's identity into a new record. Correct mistakes through the supported revision and administration workflows.
This initial clinic design is for one computer. Do not place the live database in an improvised synchronization folder or let several computers edit independent copies while assuming they form one coordinated clinic. Local application roles do not substitute for operating-system permissions, encrypted storage or a clinic backup policy.
Opening the public help page should not send a patient's name, session identifier, owner email, hardware serial or password in the URL. If support needs a screenshot, remove identifying information unless a separately approved secure support process requires it.
Authorization, login and patient access problems
If startup says no hardware is available, check the physical device and connection layer first. Verify the device type, Windows recognition and any BLE bridge before retrying. A model dropdown selection is not evidence of a connected authorized device.
If authorization says the owner or serial number is not permitted, verify the registered owner email and the actual attached device. Contact the supplier with the nonsecret error description and device identification through the approved support route. Do not disclose passwords or erase clinical records to try to change server permission.
If the Internet check cannot complete, verify network connectivity and the displayed service error. This version requires online verification. Do not use an old cached configuration as a workaround for a denied response.
If local login fails, check username, keyboard language and password visibility. If a patient is missing, confirm the current role and assignment with an administrator. If an edit is rejected as outdated, reload the latest revision before trying to save the intended correction.
Missing traces, unavailable feedback and timing surprises
If the graph is flat or empty, confirm the selected channel is supplied by the connected device, the contact is suitable and the software is not paused. Check actual reception before changing targets or starting a new recording. A neutral patient scene can mean stale/invalid feedback even while raw samples remain visible.
If recording ends earlier than expected, compare Set Session Timer with the total enabled structured plan. The earlier deadline wins. Check whether a manual Stop, device/permission error or application close occurred. Workshop completion and recording completion are not the same event.
If a workshop will not start, confirm structured training is enabled, main recording has begun, the workshop has valid steps and selected media exists. If an editor is locked, leave recording/review before editing. If a template unexpectedly disables training, recheck the enabled state restored by that template.
If replay seems to lose graphs, pause, return to a known time, inspect channel selection and verify the session number. Record the exact command sequence if the problem repeats. Preserve the original session rather than deleting it before diagnosis.
Camera, microphone and replay sound problems
Wrong camera: inspect the saved device selection and currently available device list. Reconnect the intended device or select it explicitly, then confirm the actual picture. A missing saved camera should be resolved visibly rather than by silently accepting another camera.
No recorded voice: confirm audio was enabled before recording, the correct microphone was selected, Windows allowed access and the level meter responded. Test a short new session. Historical sessions captured without audio cannot gain the missing conversation by enabling the microphone later.
Clipping or distortion in the original file: reduce input gain or adjust microphone position and test again. Stuttering or doubled speech only in internal review: stop other speech playback, return to forward 1x and compare the original file externally. If the external original is normal, report an internal playback issue rather than assuming that two microphones corrupted capture.
Video too slow or unsynchronized: compare preview, original media and exported media separately. Record the selected camera, file durations and whether sound is correct. Preserve originals; exporting again is not a substitute for determining which stage introduced the timing problem.
Missing files, export failures and recovery
If a session opens without expected media, check that its original audio/video and linked sidecars still exist and that the application can read their location. A database row can remain after files have been moved outside the application. Restore a consistent backed-up set rather than attaching a different patient's file to the session.
For an export failure, check free space, destination permission, file locks, existing output warnings and required multimedia dependencies. Try a writable clinic-approved destination. Wait for completion and verify the output externally before sharing it.
If the program closes unexpectedly, record the time, application build, patient-free reproduction steps and the affected session number for internal support use. Keep the database, session files and logs intact. Stop using a damaged installation for additional recording until its state has been assessed and backed up.
Never run a broad delete or replace operation against a shared sessions directory as a recovery experiment. Ask support to identify the exact application-owned artifacts and to preserve a reversible copy before repairing or resetting local state.
Technical terms and interpretation
HR is heart rate, usually expressed in beats per minute. BVP/PPG describes a pulse waveform; its amplitude is not the same quantity as heart rate. IBI is an inter-beat interval. HRV refers to variability of intervals, and individual HRV measures such as RMSSD, SDNN and frequency-domain ratios require their own valid data and interpretation.
GSR/resistance, temperature, respiration, pressure and CO2 represent different sensor channels. Availability, units and suitability depend on actual hardware. A channel's presence in the interface does not establish that the device supports it or that a displayed value is clinically calibrated.
Baseline, Training and Recovery are structured-plan phases. Baseline, challenge and recovery can also be workshop role labels, but those timelines remain independent. Coverage describes usable signal support over an interval. Confidence is the software's assessment of analytical reliability, not confidence in a patient's honesty or willingness.
A template is a saved preparation configuration. A workshop definition is an ordered activity description. A recording is acquired data and linked media. A meeting summary is authored care documentation. A report is a generated view or exported snapshot. A backup is a consistent recovery copy of the necessary records and linked files; none of the other items alone automatically replaces it.
Final checklist before handing over a session
Before recording: correct owner/device authorization, personal staff login, correct patient, suitable contact, plausible live signal, intended timer/plan, correct instruction language, intended camera and microphone, working level meter and adequate storage.
During recording: confirm the active state, observe quality, distinguish graph Pause from workshop Pause, add meaningful events, and remember that deadlines and conversation capture continue during graph Pause.
After recording: stop normally, wait for finalization, verify the exact saved session, inspect quality and media, complete the meeting summary and appointment status, update the practice plan when needed, verify exported files and keep a consistent protected backup.
For structured training: enabled state checked after template load, phase times and targets validated, patient display on the correct monitor, workshop started explicitly, partial runs identified honestly and comparisons limited to eligible compatible recordings.
Clinic overview: daily work and pending reviews
Open Clinic overview and reports from the clinic workspace and select Overview. This is a local operational overview, not an online analytics service. Every count is limited to records the signed-in account can access. An administrator may therefore see different totals from an assigned therapist without either display being wrong. Use your own account so changes and reports retain the correct staff identity.
The overview shows accessible patient records, planned or arrived appointments during the next seven days, open follow-up tasks and the overdue subset, draft meeting summaries, and active care goals whose review date has arrived. These counts describe documentation and scheduling workload. A goal due for review is a reminder to assess it; it does not mean the patient's condition has deteriorated or that treatment has failed.
The draft-summary table lists the patient, meeting date and therapist. Select the intended row and use Open selected patient to continue the patient's documentation. Confirm the patient identity before editing. A draft is still a draft even if the associated recording has ended. Finalize meeting summaries through the existing meeting-summary workflow; the overview does not automatically sign or rewrite them.
Use Refresh after completing work in another window. Counts reflect saved database records, so an unsaved editor is not evidence of a completed action. Follow-up tasks and review dates remain separate from physiological measurements, structured-training deadlines and the recording timer. The overview does not contact patients, create bookings or choose treatment settings; open the appropriate detailed screen to perform those actions.
Care goals: definitions, ownership and revisions
Open the intended patient's care records, select Care continuity, then Care goals. Use New care goal to record one clearly defined patient-reported measure. Enter a meaningful title, measurement unit, baseline, agreed target, review date, status and definition notes. For example, a locally agreed sleep-quality rating needs an explanation of what its numbers mean and whether higher or lower is preferable. A title alone is insufficient for later comparison.
The title permits up to 200 characters and the unit up to 40; definition notes permit up to 10,000. Numeric values must be finite and within minus one billion to plus one billion; the on-screen editors show four decimal places. These are technical input limits, not validated limits for a clinical instrument. The software does not define a questionnaire, infer a diagnosis or decide that a target is medically appropriate.
Goals may be Active, Achieved or Paused. Select a goal to see its current revision, baseline, target, latest observation for that exact revision and numeric difference from baseline. Achieved is a staff-selected status, not an automatic result of reaching a number. The review date supports the clinic overview; changing it does not alter appointments, prescribe a recording duration or automatically modify the training plan.
Use Revise selected goal to save a new revision; previous definitions remain available under Goal revisions. Only the original goal author or a clinic administrator may revise it, and patient-access permission is still required. Another authorized staff member may add an observation. If the record changed after you opened it, reload before saving. Never pool observations across changed units or definitions merely because the goal title looks similar.
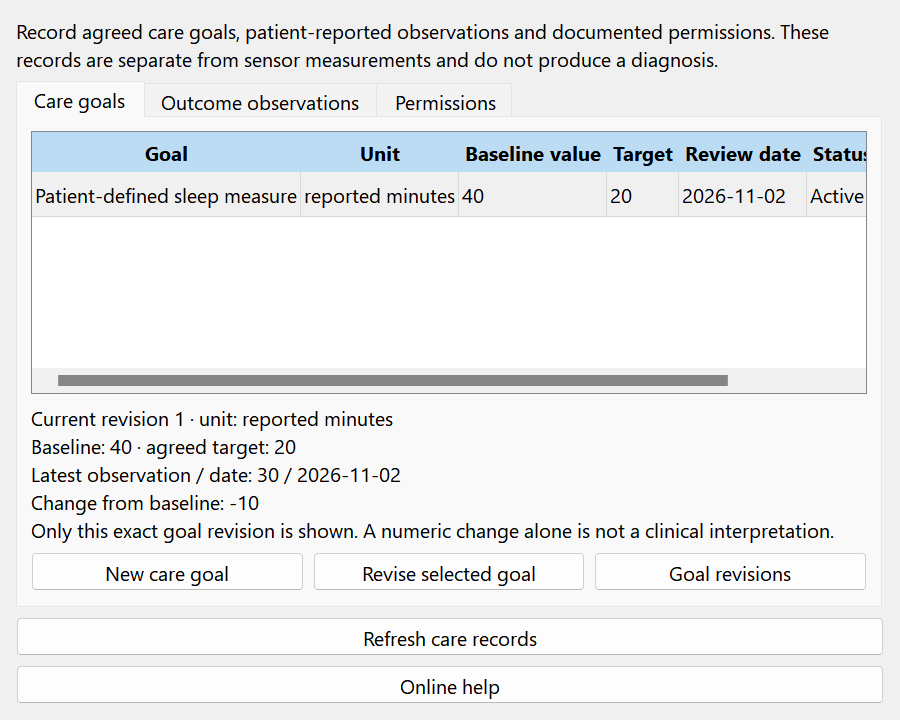
Patient-reported outcomes: recording and interpreting values
Choose Outcome observations and Add patient-reported observation. Select both the care goal and its recorded revision; the choice displays the revision and unit. Read the displayed baseline and target before entering a value. Older revisions remain selectable so an appropriately dated report can retain its original meaning. An observation does not automatically migrate to the newest definition when the goal is revised.
Enter the observation date, numeric value and explanatory notes, then save. The date must be today or earlier. The value must be finite and within the technical range of minus one billion to plus one billion; notes permit 10,000 characters. The staff member is recorded automatically. This is manual documentation from the patient's report, not an imported sensor measurement or an automatically administered assessment.
The program checks technical validity but does not enforce a goal-specific validated scale. If you define a 0–10 rating, the professional must check that the entered value belongs to that agreed scale and that its wording and timeframe stayed consistent. Zero is a real recorded number. No observation is shown as not reported, rather than converted into zero or presented as evidence of improvement.
The goal display and patient summary select the latest dated observation for the exact current goal revision and show its difference from baseline. Earlier-version observations remain visible in the observation table but are not pooled into that number. A positive or negative difference is arithmetic only. Consider context, missing entries and the patient's experience before drawing conclusions; the application neither diagnoses nor demonstrates treatment efficacy from this calculation.
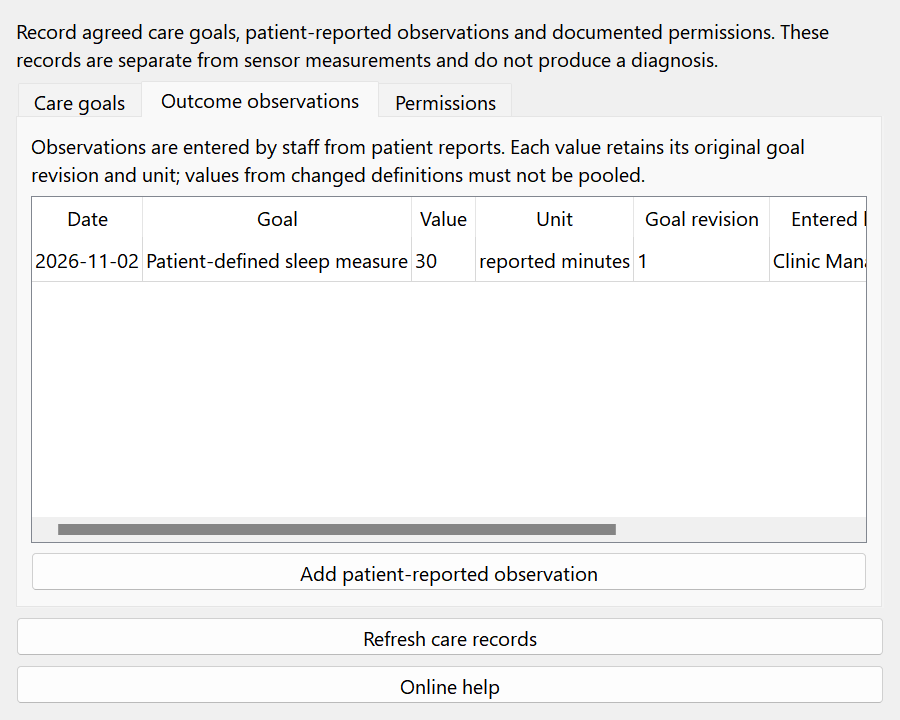
Documented permissions and withdrawal history
In the patient's Care continuity tab, choose Permissions. The ledger separates Treatment, Video recording, Audio recording and Data sharing. Review the latest displayed decision for the intended purpose before using that function. A missing entry means Not documented; it is not an implicit grant or a recorded refusal. One purpose's permission must not be assumed to authorize all the others.
Choose Document permission decision, select the purpose and Granted or Withdrawn, enter the decision date and a documentation note, then save. The note is required and may contain up to 10,000 characters; explain what was agreed and how it was documented. Dates must be today or earlier and must not precede the latest entry for that same purpose. Same-day updates remain distinguishable by their revision numbers.
Saving appends a new numbered entry and retains earlier entries, the documenting staff member and the recorded date. If someone changed that purpose's ledger after your editor opened, the application rejects the stale save; refresh and review the latest decision before retrying. The latest decision is shown separately for each purpose, while the table retains the chronology needed to understand later changes.
This ledger records decisions reported by staff. It is not an electronic signature, proof of identity, or automatic legal compliance. It does not automatically enable or block the camera, microphone or data-sharing controls. Withdrawal does not delete existing recordings. Staff remain responsible for checking the documented decision, recording only when appropriate and handling retention or deletion through the clinic's established procedures.
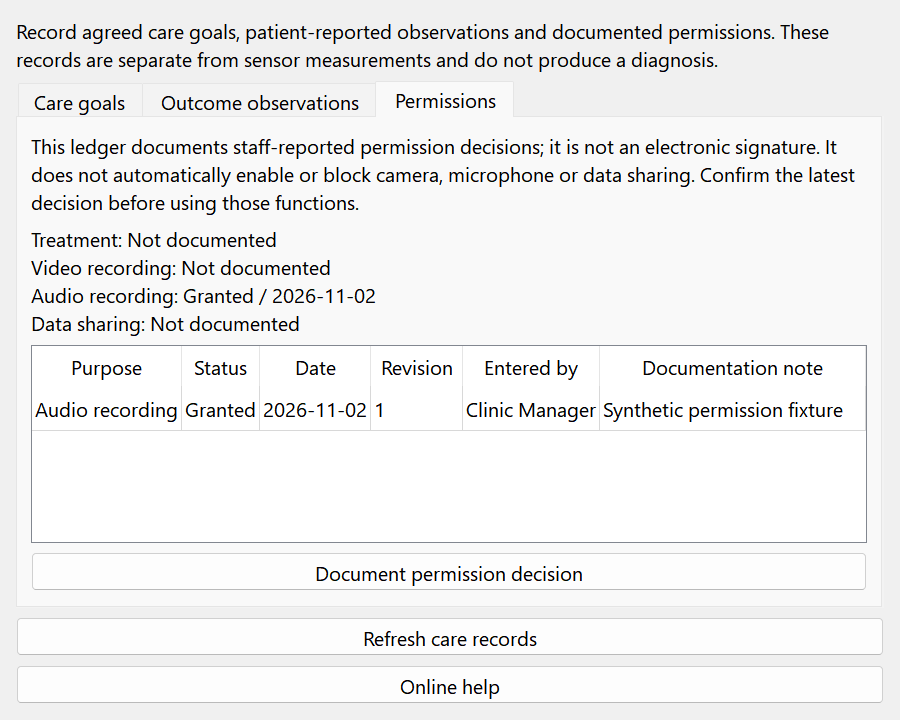
Follow-up tasks: responsibility, deadlines and completion
Open Clinic operations and select Follow-up tasks. Use New task, choose the patient and responsible therapist, and enter an actionable title, due date, priority and details. Titles may contain up to 500 characters and details up to 10,000. A task can represent reviewing a care goal, completing a summary or arranging a future visit. It is independent of a sensor recording and can exist without one.
Priority is Normal or High; status is Open, Done or Cancelled. Open tasks with a due date before today are highlighted as overdue, and the clinic overview counts them separately. A past due date is allowed and does not automatically complete, cancel or reschedule the task. High priority is an organizational label, not a medical emergency alert or automatic notification to another person.
Select a row and choose Edit selected, or double-click the row. A saved task retains its patient; the editor does not move it to another person. Administrators can assign an authorized active provider; therapists create or update tasks assigned to themselves within their patient permissions. A therapist cannot revise another therapist's task simply because both can view the same patient. Some historical items can still be closed after an assignment ends.
Save after changing the status to Done or Cancelled. Editing is version checked: if a newer save exists, reload and compare it before trying again. Sorting the table preserves the underlying record identity. Use Refresh to see saved changes. Tasks do not send email or SMS, place calls, reserve time or prove that the clinical work occurred; document the actual work and relevant meeting notes separately.
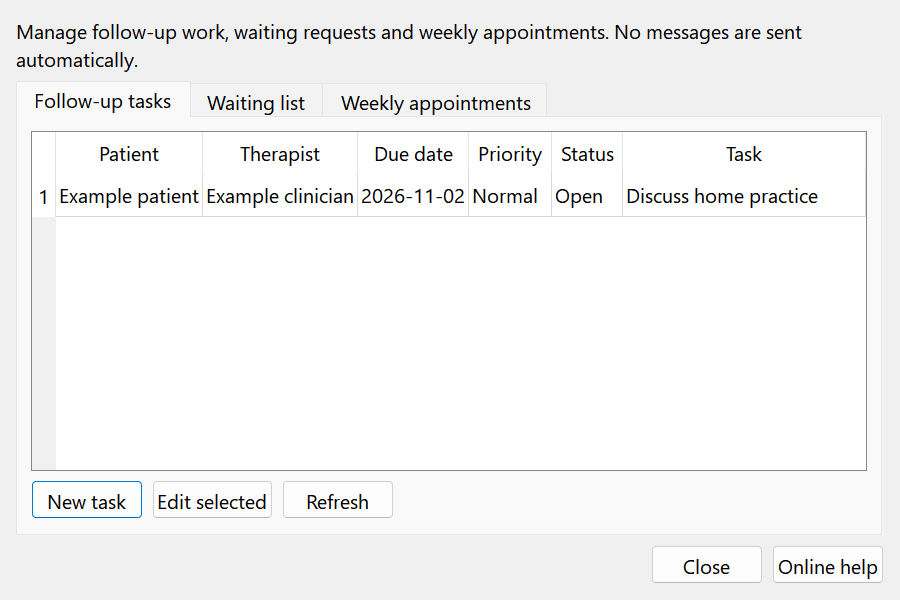
Waiting requests: preferences, contact and closure
In Clinic operations select Waiting list, then New waiting request. Choose a patient already registered in the clinic and the responsible therapist. Enter the preferred From date and Until date, plus notes explaining practical availability or the reason for waiting. The start date may equal the end date but may not be later. Notes allow 10,000 characters; avoid unnecessary sensitive detail.
The available statuses are Active, Contacted and Closed. Active means the request remains under consideration. Contacted records a staff-selected workflow status; the application has not sent a message, placed a call or verified a reply. Closed removes the request from active work without deleting its stored history. Use the notes to document actual contact and the agreed next action.
Select a row to edit it, or double-click. The saved entry remains attached to its original patient. Administrators manage authorized assignments; a therapist updates entries assigned to themselves, within their patient permissions. An entry can sometimes be closed after its original assignment becomes inactive. Changes are version checked, so reload after a stale-record warning rather than overwriting a newer update.
The waiting list is an organizational aid, not an automatic slot-matching or booking engine. When a suitable time becomes available, confirm it with the patient through your normal process and create the appointment explicitly. Mark the request appropriately afterward. Several entries are not automatically merged, expired ranges are not automatically closed, and Contacted does not reserve a slot. Check existing requests before creating another.
Weekly appointments: complete-series validation and local time
Open Clinic operations, select Weekly appointments and choose Create weekly appointments. Select the registered patient and an actively assigned therapist. Set the first appointment in the computer's local date and time, duration in minutes, weekly count and purpose. The initial suggestions are tomorrow, 45 minutes and six appointments; review them rather than assuming they suit the patient. The allowed duration is 1–1,440 minutes and the count is 1–52.
The application reconstructs each appointment seven calendar days after the previous date, at the same local clock time. It does not simply add a fixed number of UTC seconds across daylight-saving changes. Appointments are stored as UTC instants for consistent conflict checking. If an occurrence lands in a nonexistent local clock time during a daylight-saving transition, the entire request is rejected; choose a different time and retry.
Every occurrence is checked against planned or arrived appointments for both the patient and the therapist. A patient cannot be booked simultaneously with another therapist, nor a therapist with another patient. Adjacent appointments whose boundaries touch are allowed; overlapping intervals are not. Existing completed, cancelled or missed records do not block new bookings under this rule. Permissions and active assignments are checked before creation.
The series is saved within one transaction: if any occurrence conflicts, has an invalid time or fails to save, none of the new appointments is committed. Correct the cause and submit again; do not assume a partial series exists. Successful occurrences are ordinary planned appointments visible in the existing calendar workflow. This is weekly batch creation, not a permanently linked recurrence rule; edit or cancel individual bookings normally. No invitations, reminders or external calendar synchronization are sent.
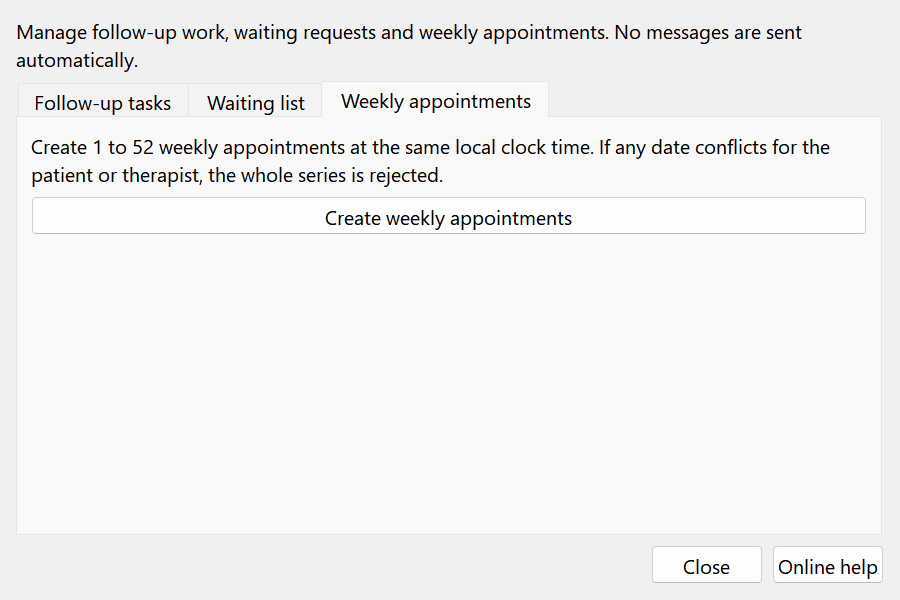
Administrator audit history: what it proves and what it does not
Sign in as a clinic administrator, open Clinic overview and reports and select Audit history. This tab is not available to ordinary therapist accounts. It displays the most recent 200 application audit events, not an unlimited searchable archive. Use Refresh to reload the current saved entries. The administrator must still protect the workstation and restrict access to exports and database copies.
Each displayed row provides event number, time marked UTC, staff member, patient when applicable, action and record number. UTC timestamps may differ from the local clock used for appointments and report generation. An event number or record number identifies a saved entity; it is not a session ordinal or evidence that another patient was selected. Use the corresponding detailed workflow to inspect the underlying record.
The history helps explain supported application changes such as saving a goal, observation, permission, appointment, follow-up item or waiting request. It is not a complete log of every read, screen opening, printed page, filesystem copy or operating-system action. Do not conclude that an event absent from the latest 200 never occurred, or that viewing this tab alone establishes who accessed every clinical detail.
This is ordinary local application history, not tamper-proof or independently certified audit storage. A person with direct filesystem/database privileges has capabilities beyond the application's role controls. Keep appropriate Windows accounts, backups and clinic procedures. The ledger complements retained clinical revisions but does not replace them; corrections to a final meeting summary still require the existing documented correction process.
Patient care summary: selective disclosure and export
Open Clinic overview and reports and select Patient care summary. Choose the patient by name and verify the patient number in the preview. The available patients follow the current account's permissions. The report identifies its generation time and generating staff member. It summarizes entered clinic records; it is not a diagnosis, validated outcome score, signed consent document or replacement for the original clinical record.
By default the summary includes care goals and their latest exact-revision observations, the latest documented permissions, open follow-up tasks and the current practice plan. If there is no current-revision observation, the report says so rather than borrowing an older value. Goal status and numeric changes do not establish treatment success. An empty section means there are no corresponding documented entries, not that the patient has no difficulties.
Personal and treatment history, and the most recent 20 meeting summaries, are excluded until you select their checkboxes. Consider the recipient and purpose before including these sensitive texts. The meeting-summary option includes the latest summary text with date, therapist and Draft or Final status; it is not a full revision archive. Review the preview carefully after changing the patient or disclosure options, and use Refresh report when necessary.
Use Export PDF or Export HTML, choose a destination and confirm the file. Labels follow the current interface language, including right-to-left presentation in Hebrew and Arabic; authored patient text remains as written. Exported files contain private patient information and are not uploaded or emailed automatically. Protect the destination and share only through an approved process. Export is not a complete clinic backup; preserve the database, media and original records through the established backup workflow.
Shared note templates: reusable prompts without patient details
In the meeting-summary editor use Load note template to preview a shared template, or Save note template to open a new blank template editor. The latter does not copy the current meeting's text. Templates contain five reusable text areas: meeting topics and summary, training performed, patient response, therapist impression, and instructions and next meeting. They do not create questionnaires or validated scales.
Enter a template name up to 120 characters and reusable content in at least one field. Each field permits 10,000 characters, and the clinic permits 100 active templates. Confirm that no names, contact details, identifiable history or case-specific findings are included before saving. Active templates are shared with authenticated clinic staff; authored text stays in its original language and is not automatically translated.
Loading requires confirmation because it replaces all five text fields in the open draft. It leaves patient, date, therapist, recording link and final-summary status unchanged. No patient record is saved merely by loading. Adapt and verify the text, then save the meeting summary normally. If the template changed or was archived during selection, refresh rather than loading an outdated choice.
The template's author or an administrator can revise or archive it and inspect retained revisions. Archiving preserves existing meeting summaries and template history, but prevents loading the archived template. Version checks reject stale edits. Create a separate suitable language version when needed; never treat generic prompts as actual clinical findings or publish identifiable patient text to the shared library.